Installing Semplice on macOS
1.0 Introduction
 For several years, the best I could do by way of offering support for running Semplice on macOS was to say, “It probably works fine, but I can't really say for sure” because all my Apple hardware dated from 2012, 2014 or 2015. My various iMacs and Mac Minis thus all used Intel hardware and were severely restricted in what versions of macOS they could run without adding the complication of using the Open Core Legacy Patcher to the mix.
From the end of January 2026, however, that is no longer true. I still have all those Intel Macs, so I can test Giocoso on those and their assorted old versions of macOS… but I now own an M4 iMac and can therefore attest that Semplice installs and runs on Apple Silicon just fine and that the latest version of macOS (Tahoe, at the time of writing) works perfectly fine with the latest version of Giocoso (version 3.34 at the time of writing).
For this reason, running Semplice on Apple's hardware is now Tier 1 support territory: it is, in fact, my new daily driver and I can therefore state with confidence not merely that it ought to work but that it very much does work.
Having said that, I'll point out that ripping CDs with Apple SuperDrives will work but that the usual automatic detection of an appropriate read offset cannot be done: Apple intentionally obscures the manufacturer's ID information for such drives. That's a problem because they are made by different manufacturers and therefore will have different read offsets but, since it's impossible for macOS to identify which manufacturer made which specific device, the correct read offset cannot be determined. Your best bet in these cases is to (1) plug your SuperDrive into a Linux or Windows PC, determine the manufacturer's ID there, and then manually search the AccurateRip database to find a match: once you know the correct read offset, plug the drive back into your Apple PC and configure the appropriate read offset in Semplice's persistent configuration file; or (2) use a third-party optical drive with your Apple PC: standard auto-detection of the correct read offset works with such drives without an issue.
One other point of difference between Semplice running on macOS and on anything else: Semplice on macOS cannot verify your CD rips using the AccurateRip database. The software to do so is not readily installable on macOS, unfortunately. The rips will likely still be accurate, because the cdparanoia ripping engine works that way: you just won't be able to confirm they're accurate.
Another ripping 'issue': note that on Linux, optical drives are polled continuously until the insertion of a CD is detected, then automatic identification and offset determination takes place. That is not how it works on macOS! On macOS, there has to be an audio CD inserted into the drive before the operating system is even aware that a CD drive exists. As far as macOS is concerned, it cannot even enumerate optical drives until media is inserted into it, so there's nothing to poll to see if insertion has occurred! Practically, this means you have to insert the CD into your drive, wait a bit for its table of contents to be read… and only then can you take the Ripping menu, Option 1.
I should mention, too, that it is strongly recommended to have only one optical drive connected to your Mac before attempting to rip: Semplice's code does not handle multiple drives at all well and errors will result if more than one drive exists.
Finally, note that Option 2 on the Ripping menu just does nothing on macOS: the drive detection mechanism used by that option is completely different on Linux vis-a-vis macOS, so none of it works.
Those slight differences between Semplice-on-Linux and Semplice-on-macOS out of the way, however, the basic principle of getting Semplice to run on macOS is, essentially, to install a quasi-Linux 'userland' of tools and utilities, thus creating an environment Linux-y enough for Semplice to cope. There are two possible ways of doing that: by using Homebrew or MacPorts as a quasi-package manager.
Homebrew supports only newer macOS releases (basically, Sonoma, Sequoia and Tahoma). It will work on older releases, but with quirky glitches and errors that have to be worked around. On those older releases, too, Homebrew tends to compile things from scratch, which works eventually but takes ages to complete: one install on Catalina took over 6 hours to finish! I really wouldn't recommend Homebrew installs unless you're running newer macOS versions on decent hardware, therefore.
MacPorts supports older macOS releases very well (and the newer ones, too) and its installs are relatively quick in all cases. I would certainly recommend the MacPorts approach to running Semplice, therefore.
However, it's not a free choice: if you've ever used Homebrew before, you must not switch to using MacPorts, nor vice versa. It's one or the other, but software mayhem awaits anyone trying to use both.
So, if you've used neither package manager before, I'd recommend MacPorts, especially for older macOS releases. If you've used one or other before, you must continue to use that manager now. Anything older than Monterey is really a problem for Homebrew installations, however, so if you can avoid that, I'd strongly recommend you to do so.
Anyway, if macOS is detected, Semplice's installer will prompt you to tell it which package manager it should use.
This documentation will thus chart two paths forward: one, the Homebrew approach; the other, the MacPorts one. Pick one and only one! In both cases, however, you end up with a system that is capable of running Semplice, so the two paths merge thereafter for the purposes of running and using Semplice. My recommendation remains, however, that the MacPorts approach is simpler and faster (and better tested!)
2.0 Installing Homebrew
Before we can install Homebrew, we need to install all the command line utilities that allow software to be compiled. In a terminal window, type the command:
xcode-select --install
Once that install has completed, type:
/bin/bash -c "$(curl -fsSL https://raw.githubusercontent.com/Homebrew/install/HEAD/install.sh)"
That will download the Homebrew software itself and install it: respond appropriately to any prompts put to you. At the end of the Homebrew installation, you'll see a message that tells you to type three convoluted commands that put Homebrew in your system's path. Mine were:
echo >> /Users/hjr/.zprofile
echo 'eval "$(/usr/local/bin/brew shellenv)"' >> /Users/hjr/.zprofile
eval "$(/usr/local/bin/brew shellenv)"
Obviously, yours won't say “hjr”! Type the personalised equivalents of those commands into your own terminal. This is especially true for macOS on Apple Silicon: the paths are quite different on that platform (using /opt/homebrew rather than /usr/local/bin/homebrew, for example), not because it's the Apple Silicon making a difference but because Homebrew changed its default locations in the later versions that Apple Silicon PCs will be using.
At this point, you will need to install a couple of pieces of critical software that are needed just to obtain the Semplice installer, let alone to run it. I also suggest that you manually install a few other packages, largely because (a) I've had errors when the Semplice installer tries to do the same; and (b) a couple of these packages can take literally 5 or 6 hours to compile (though I will note that Homebrew installs on more modern versions of macOS are much quicker than that. I think it better that you see that happening for that length of time, rather than sit staring at an apparently 'stuck' Semplice installer attempting to do the same things. Get the pain out of the way early, rather than experience it during the Semplice install, in other words. Type these commands one at a time, in the order shown, bearing in mind that the first one might take nearly six hours to complete on older hardware:
brew install wget bash wezterm fd flac ffmpeg xterm dialog freetype xquartz
brew postinstall openssl
brew postinstall llvm
Next, you must install ImageMagick. You can try to install that via Homebrew: my experience on Monterey and Sequoia was perfectly reasonable, but things failed miserably on Catalina (with the error “Failed to download resource libzip (1.11.4)” or similar). So by all means try a brew install imagemagick (all in lower case, with a 'k' on the end). On later macOS releases, that will probably work fine.
On much earlier macOS releases, however, it will probably fail miserably, in which case you should issue these commands instead:
- cd
- cd Downloads
- tar -xzf ImageMagick-x86_64-apple-darwin20.1.0.tar.gz
- sudo mv ImageMagick-7.0.10 /usr/local/ImageMagick
Next:
- sudo nano /etc/paths
- At the top of the file, add a new line reading: /usr/local/ImageMagick/bin
- sudo cp -R /usr/local/ImageMagick/lib/* /usr/local/lib
- sudo cp -R /usr/local/ImageMagick/bin/* /usr/local/bin
Finish off with:
magick -version
…and if you get output that reads something like “ImageMagick 7.0.10.43 Q16 …” then you know that ImageMagick is working as intended. Having to faff around like this on older versions of macOS is why MacPorts is preferred for them: you probably won't have this sort of issue on newer or current versions.
A final step rounds things out: edit /etc/paths and put the path to the Homebrew bin folder at the top of the list. A simple way to determine what path that should be is to type this command in a terminal:
which magic
On Catalina, for example, that returned the result:
/usr/local/bin/magick
…which tells me that Homebrew has installed its software into “/usr/local/bin”.
On Monterey and Tahoe, however, I got this result instead:
/opt/homebrew/bin/magick
…which tells me that Homebrew has installed its software into /opt/homebrew/bin.
Either way, once you know the 'Homebrew binaries folder', you need to add it to the very top of the /etc/paths file:
sudo nano /etc/paths
It is quite likely that /usr/local/bin is already at the top of the default list of path folders. If that's the case and your homebrew binaries folder is /usr/local/bin then you can just close down the editor without altering anything. If your homebrew binaries folder is “/opt/homebrew bin”, however, then you'll need to type that as the very first line in the /etc/paths folder, pushing all the existing lines down one.
Failure to put the Homebrew bin folder first in your path means that the wrong version of Bash will get used to run Semplice… and that will break things horribly!
Once those installations are complete, you'll be free to download the Semplice installer and run it… for the which, see Section 4 below! For now, close the terminal you were using to install these packages and open a brand new one to do the Semplice install: that way, new paths and installations are fully picked up by the new terminal session.
3.0 Installing MacPorts
Before we can install MacPorts itself, we need to install the various command line utilities that MacPorts will expect to find on the system: these are programs that, for example, compile source code into executable binary packages. Fortunately, this is quite easy to do.
Simply open a terminal and type the command:
xcode-select --install
A graphical dialog will ask you if you really want to install the command line tools:
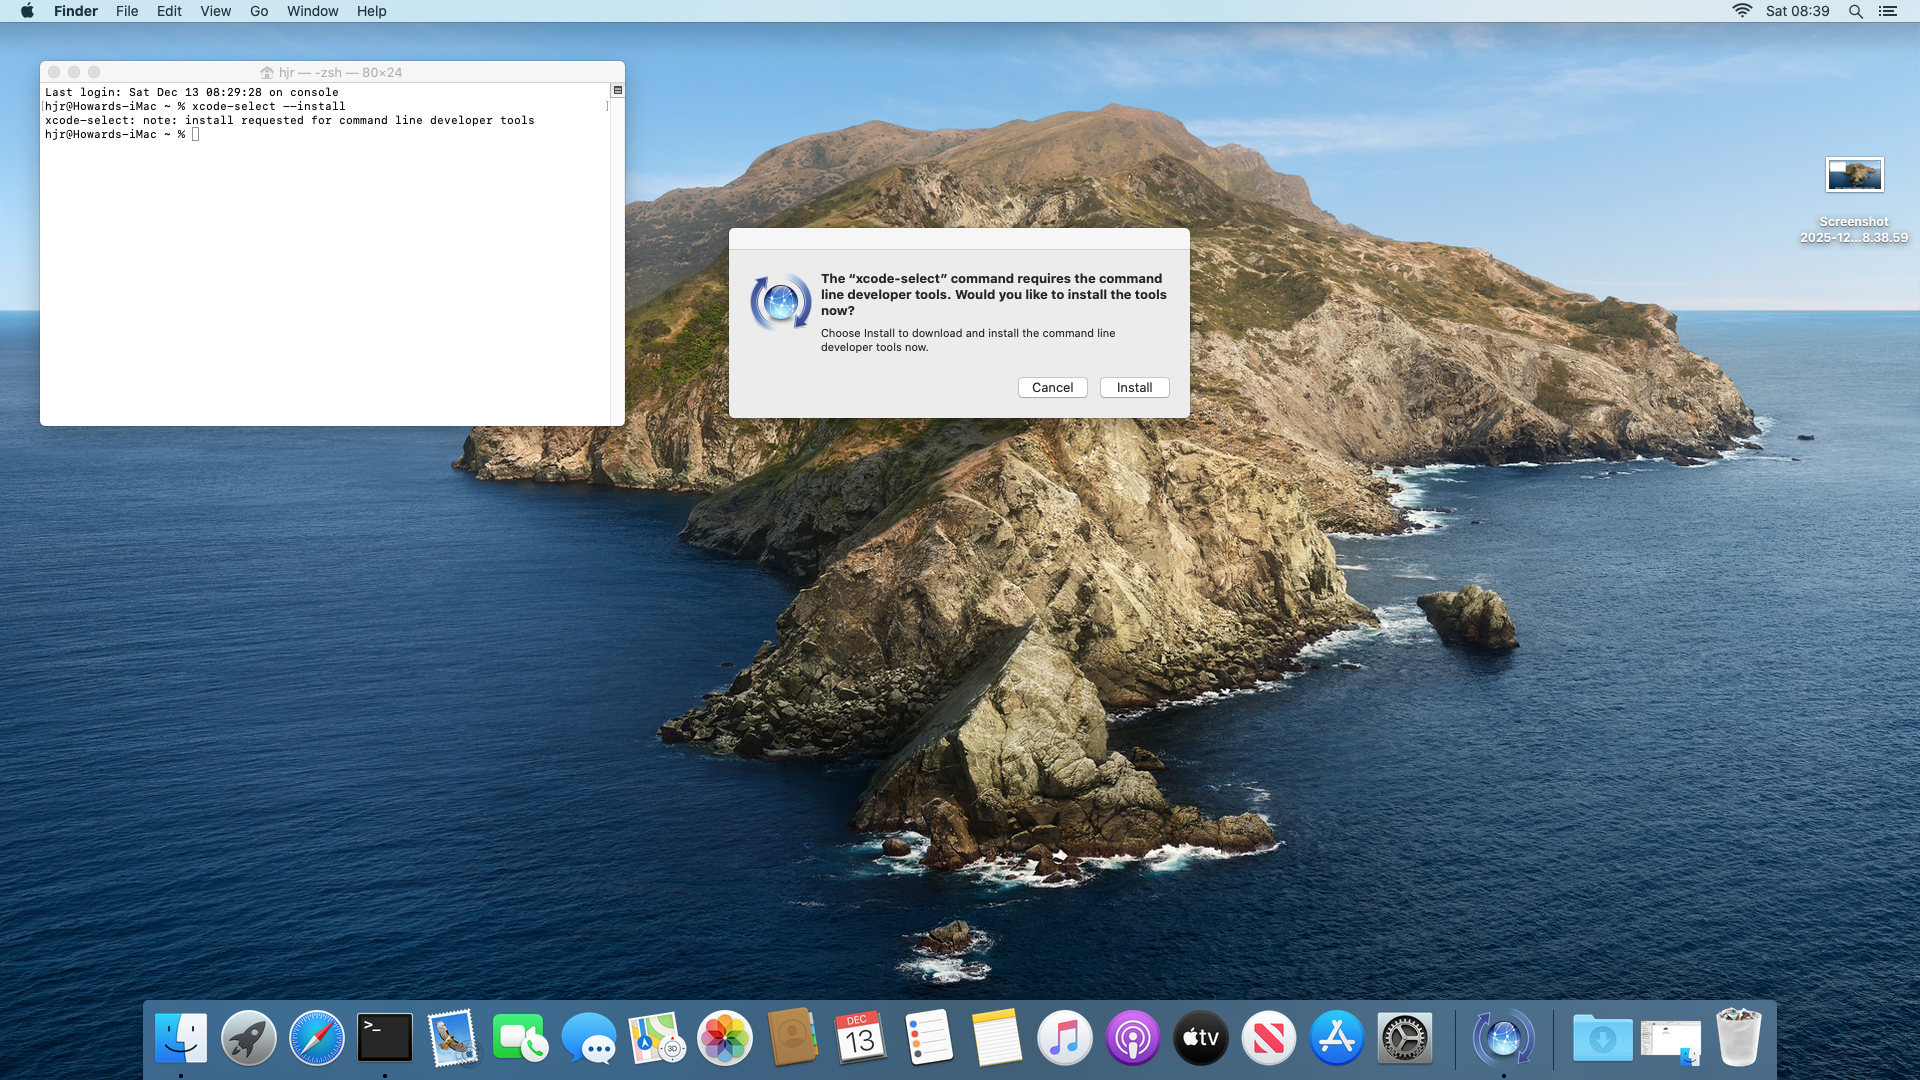
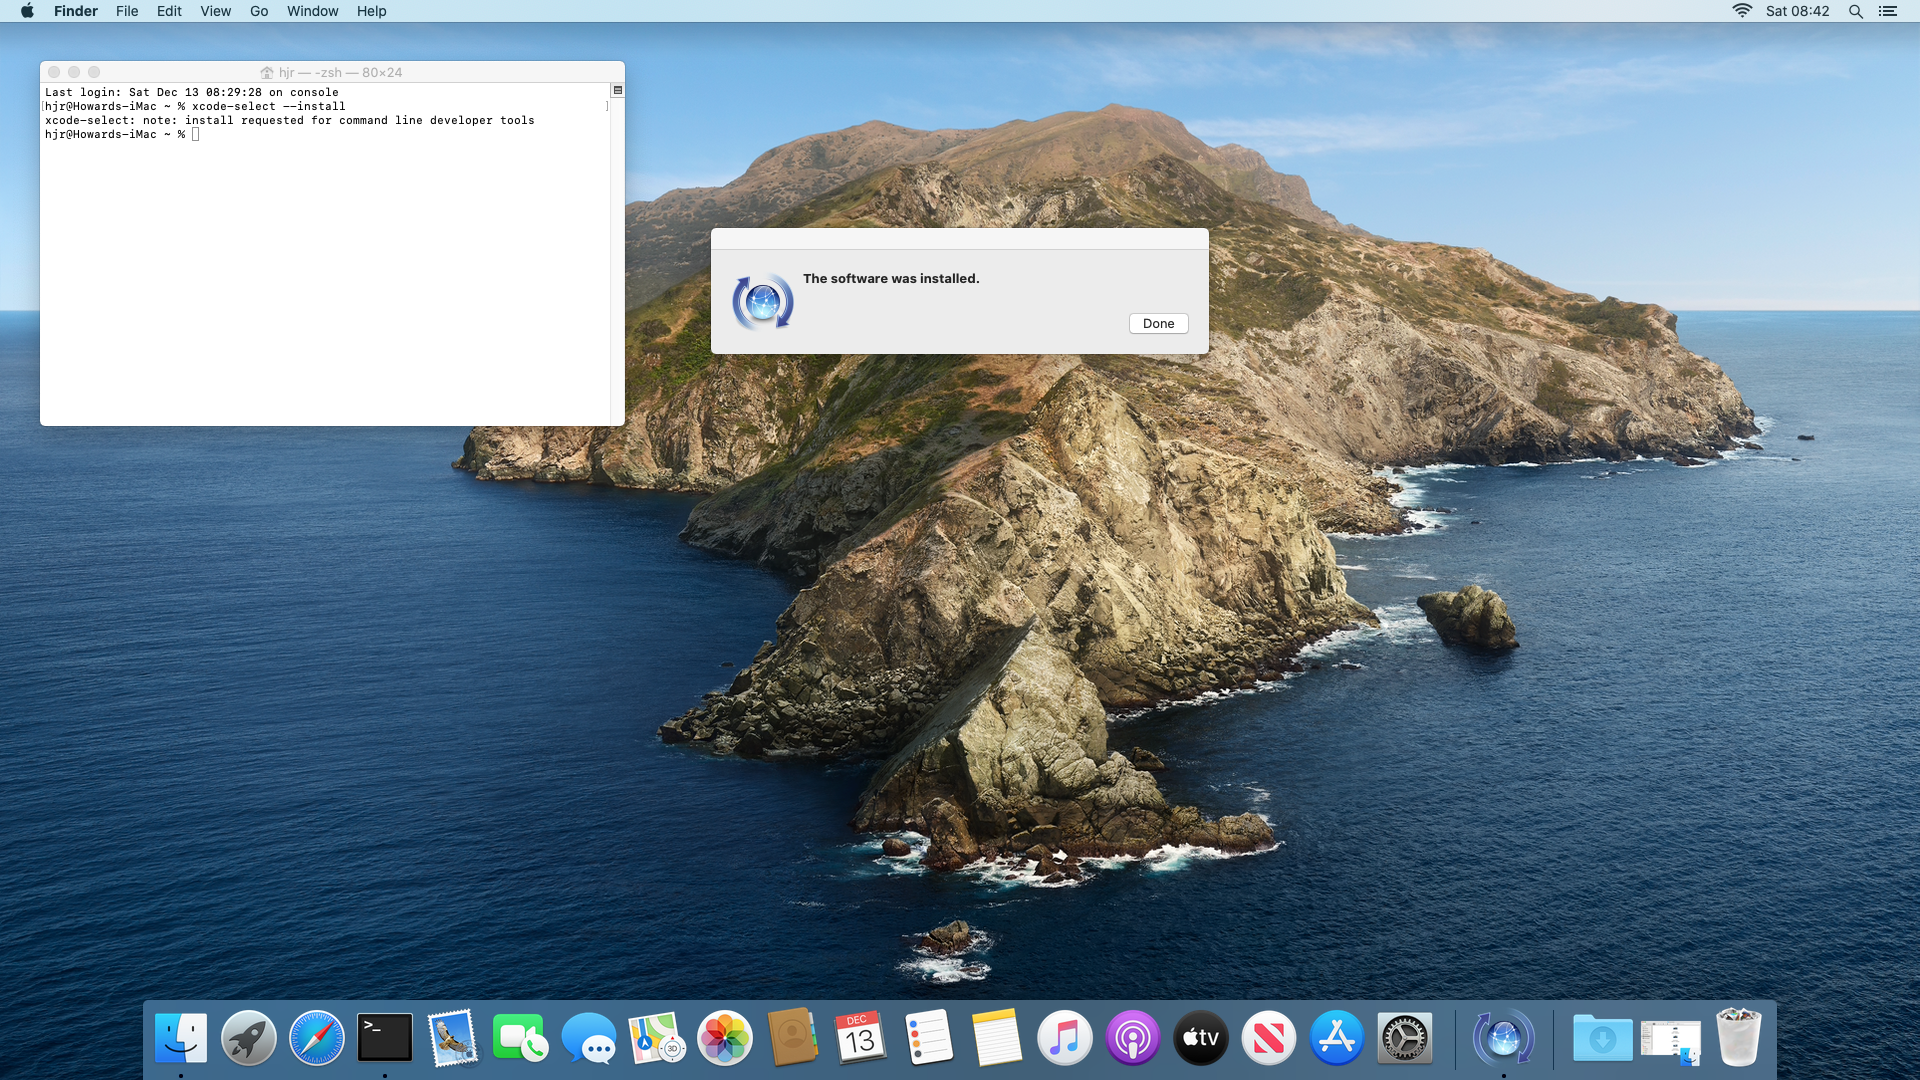
Click [Install] and agree to the ludicrously long licence agreement that appears. A lengthy download of the relevant software then takes place, ending with this:
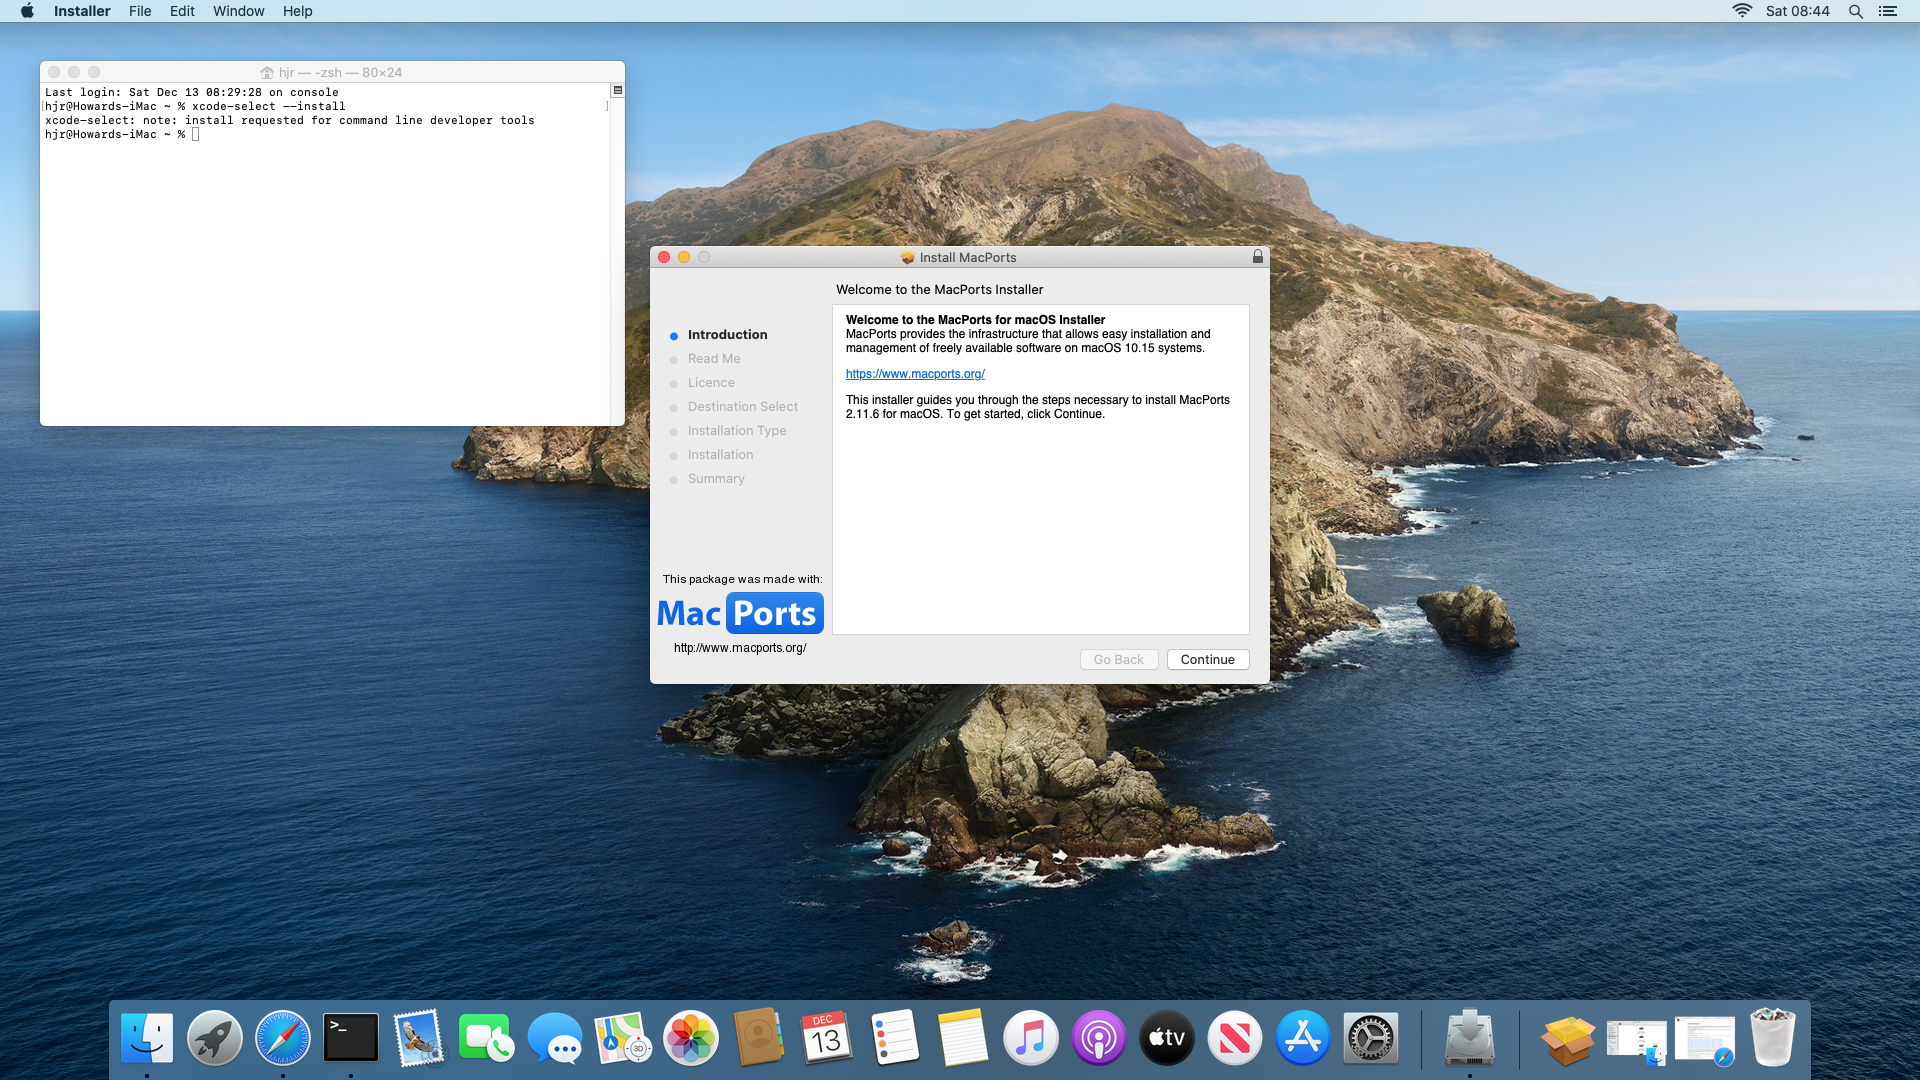
Once those tools are installed, you need to obtain an appropriate version of MacPorts: different releases of macOS need different instances of the MacPorts software. At the time of writing (January 2026), these were the latest os-dependent releases available:
https://github.com/macports/macports-base/releases/download/v2.11.6/MacPorts-2.11.6-26-Tahoe.pkg
https://github.com/macports/macports-base/releases/download/v2.11.6/MacPorts-2.11.6-15-Sequoia.pkg
https://github.com/macports/macports-base/releases/download/v2.11.6/MacPorts-2.11.6-14-Sonoma.pkg
https://github.com/macports/macports-base/releases/download/v2.11.6/MacPorts-2.11.6-13-Ventura.pkg
https://github.com/macports/macports-base/releases/download/v2.11.6/MacPorts-2.11.6-12-Monterey.pkg
https://github.com/macports/macports-base/releases/download/v2.11.6/MacPorts-2.11.6-11-BigSur.pkg
https://github.com/macports/macports-base/releases/download/v2.11.6/MacPorts-2.11.6-10.15-Catalina.pkg
https://github.com/macports/macports-base/releases/download/v2.11.6/MacPorts-2.11.6-10.14-Mojave.pkg
https://github.com/macports/macports-base/releases/download/v2.11.6/MacPorts-2.11.6-10.13-HighSierra.pkg
https://github.com/macports/macports-base/releases/download/v2.11.6/MacPorts-2.11.6-10.12-Sierra.pkg
Check the Macports website for the actual versions current at the time you want to install. There are versions available for macOS releases earlier than Sierra, but installing Semplice on such ancient operating systems is definitely not supported at all, so be my guest but you're on your own for them!
Once you've downloaded the correct package for your operating system, visit your Downloads folder in Finder and double-click the pkg file to launch the installation wizard:
Click your way through the wizard, agreeing to the inevitable licence, and choosing an appropriate hard drive to install onto:
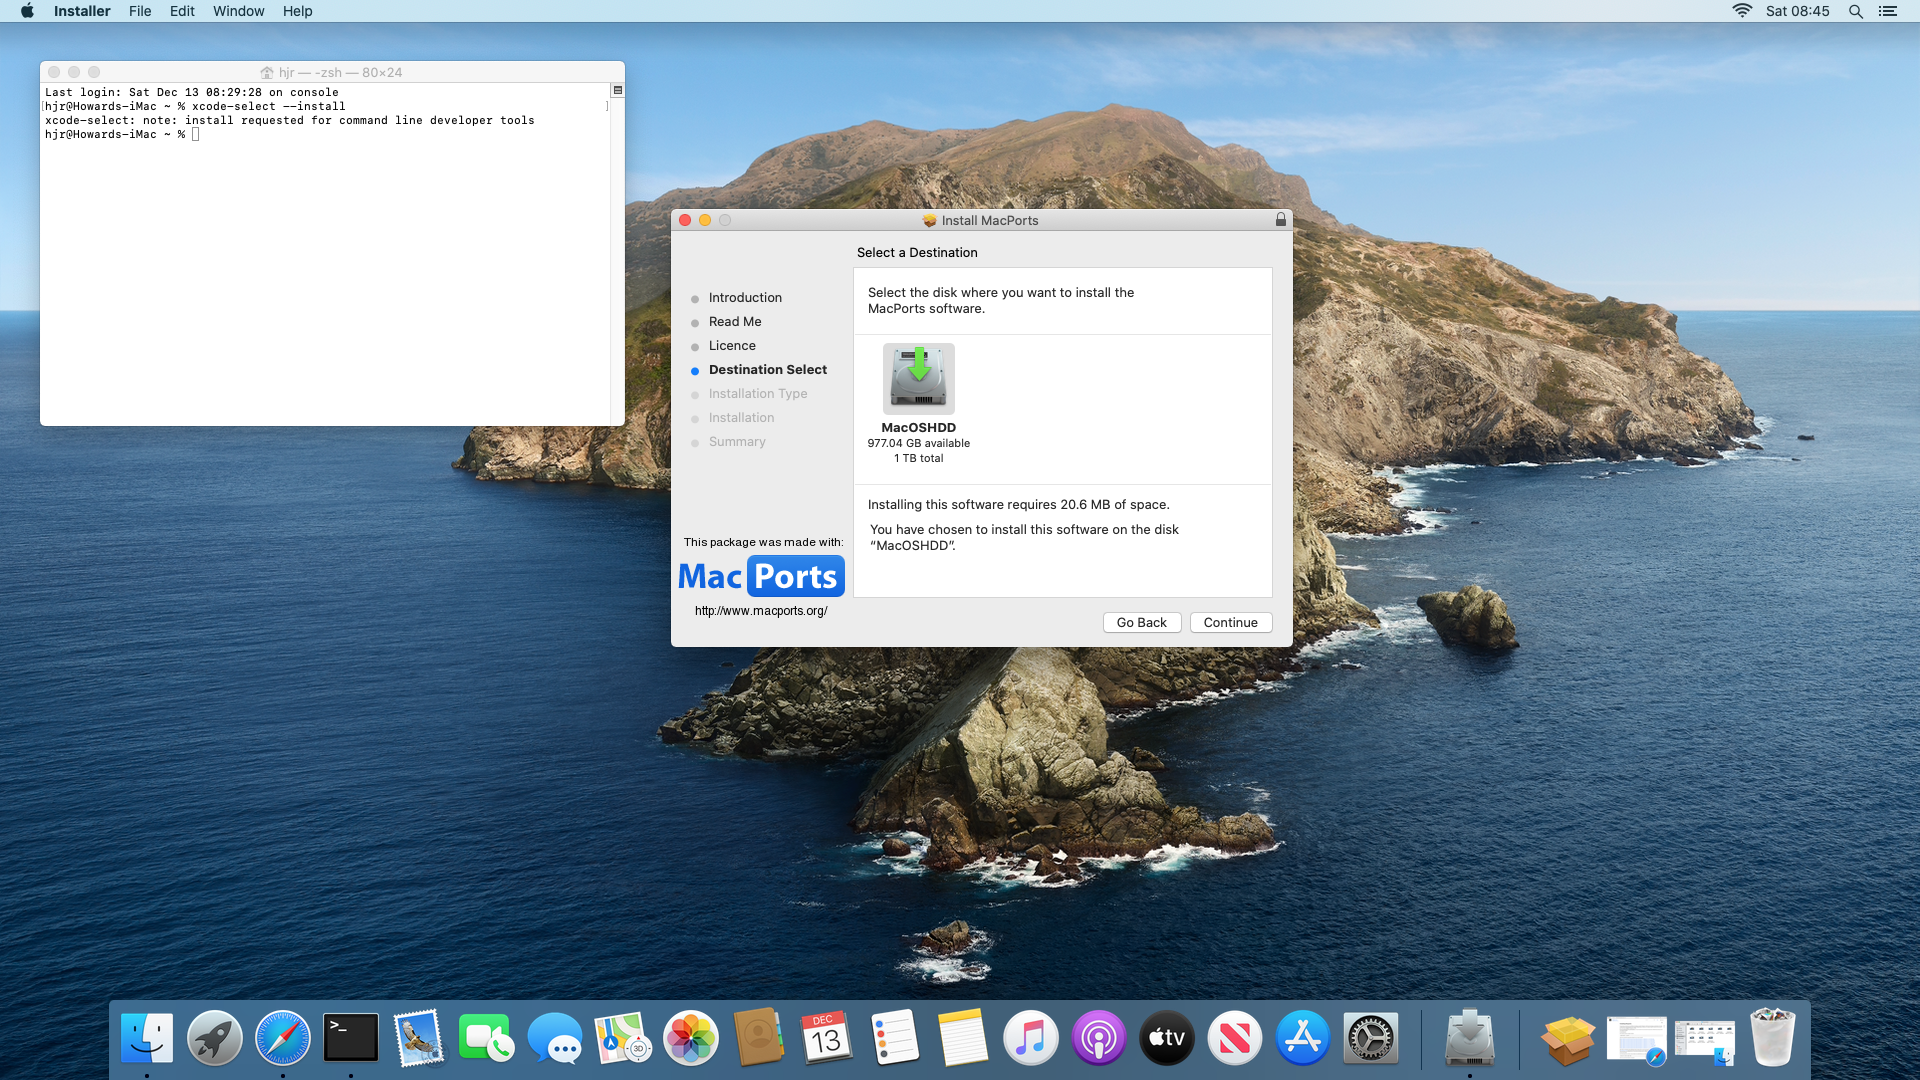
You'll be prompted for your administrator password and then the software installation will begin. Once it's complete, you'll be asked whether to move the downloaded MacPorts package to the bin or keep it: either answer is fine, but you won't need to install MacPorts again, so you might as well bin the package!
Next you will need to add the MacPorts path to your system's PATH variable: you do that by typing the command:
sudo nano /etc/paths
At the very top of the file, before all other listed folder names, add the line:
/opt/local/bin
…and then save the modified file. It is important this new path appears first in the file, because that determines the order in which macOS searches for executables -and we want the MacPorts executables to be found before macOS's built-in ones. Only in this way can we be sure, for example, that the MacPorts version of Bash is used in preference to macOS's ancient version of Bash (which won't be able to run Giocoso properly).
You make this change of path variables take effect by closing your existing terminal window and opening a new one.
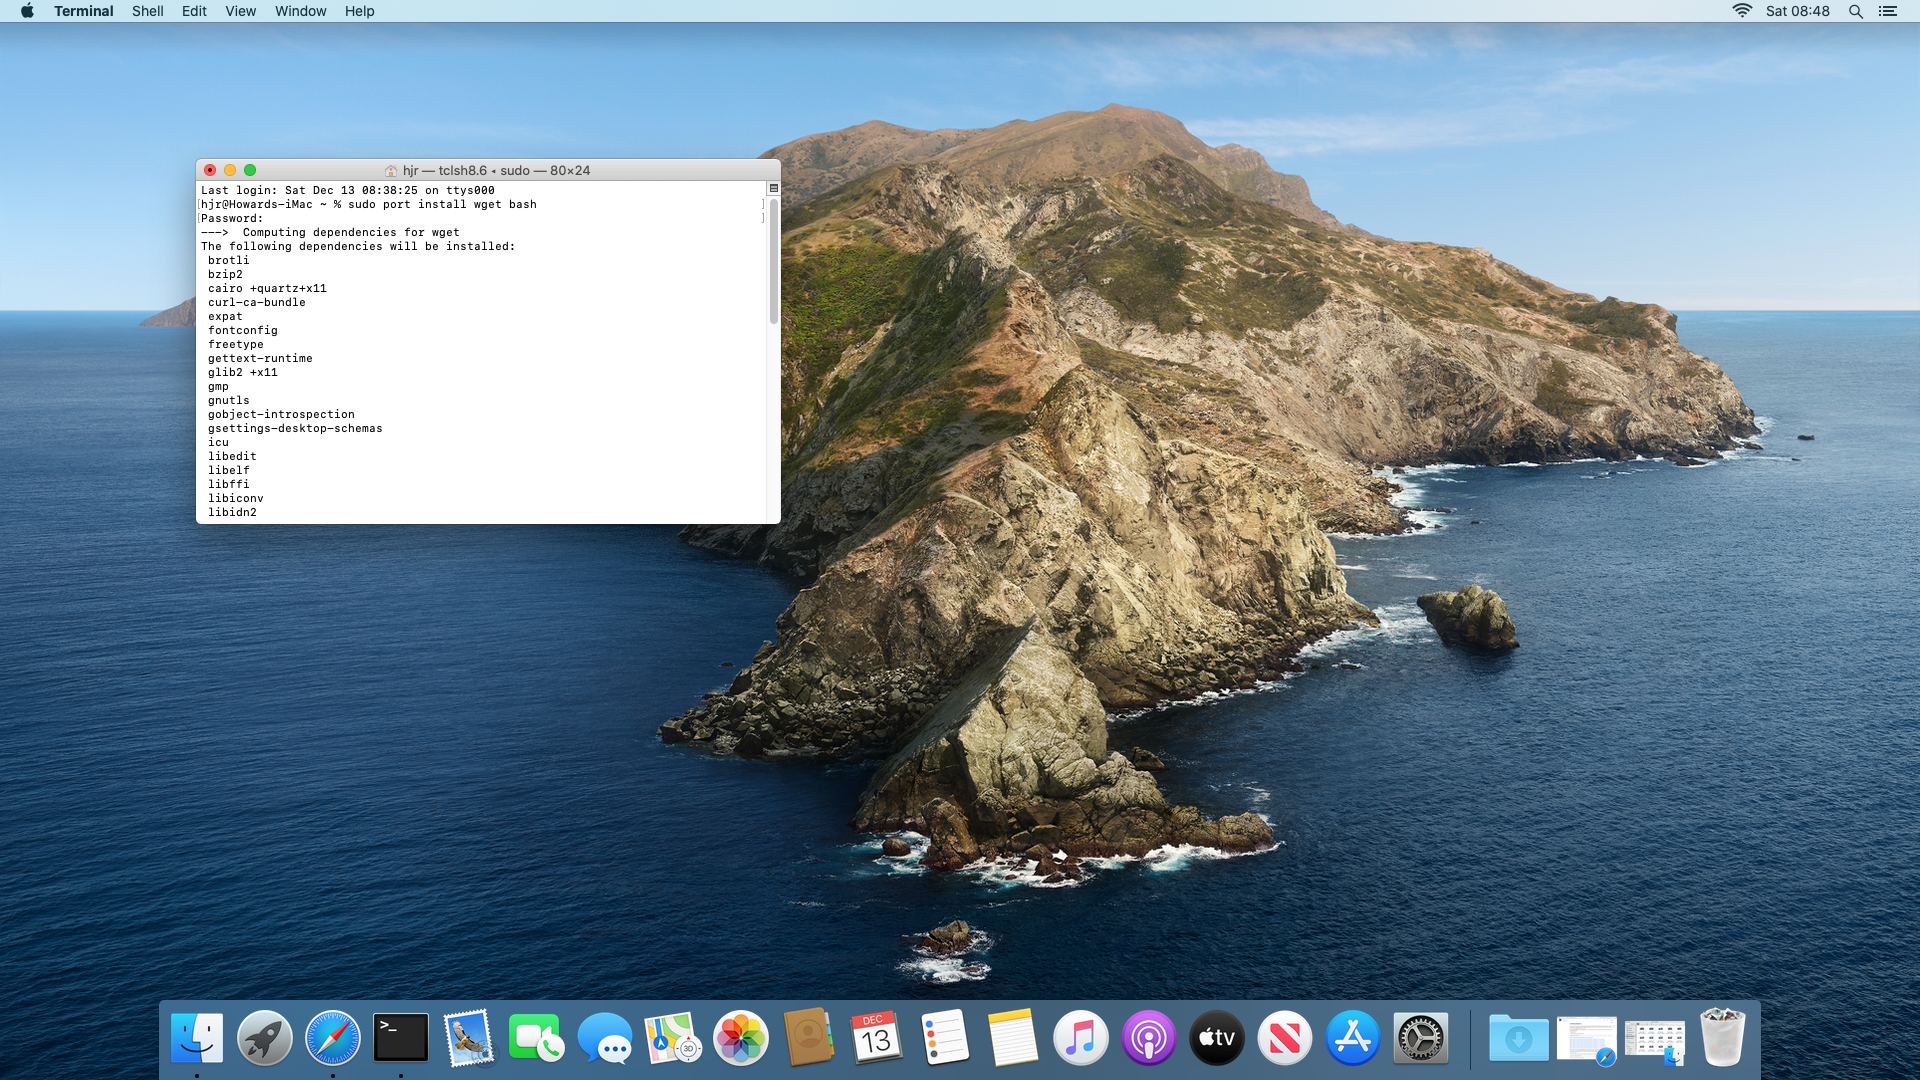
Once that's all done, you need to install a couple of software packages before you can attempt to install Giocoso. Just type the command:
sudo port install wget bash
You'll see MacPorts proposing to install a bunch of related software besides those two packages:
When prompted, say 'y' to continue. The software installation will be relatively swift, and will end with a wall of text that you can safely ignore:
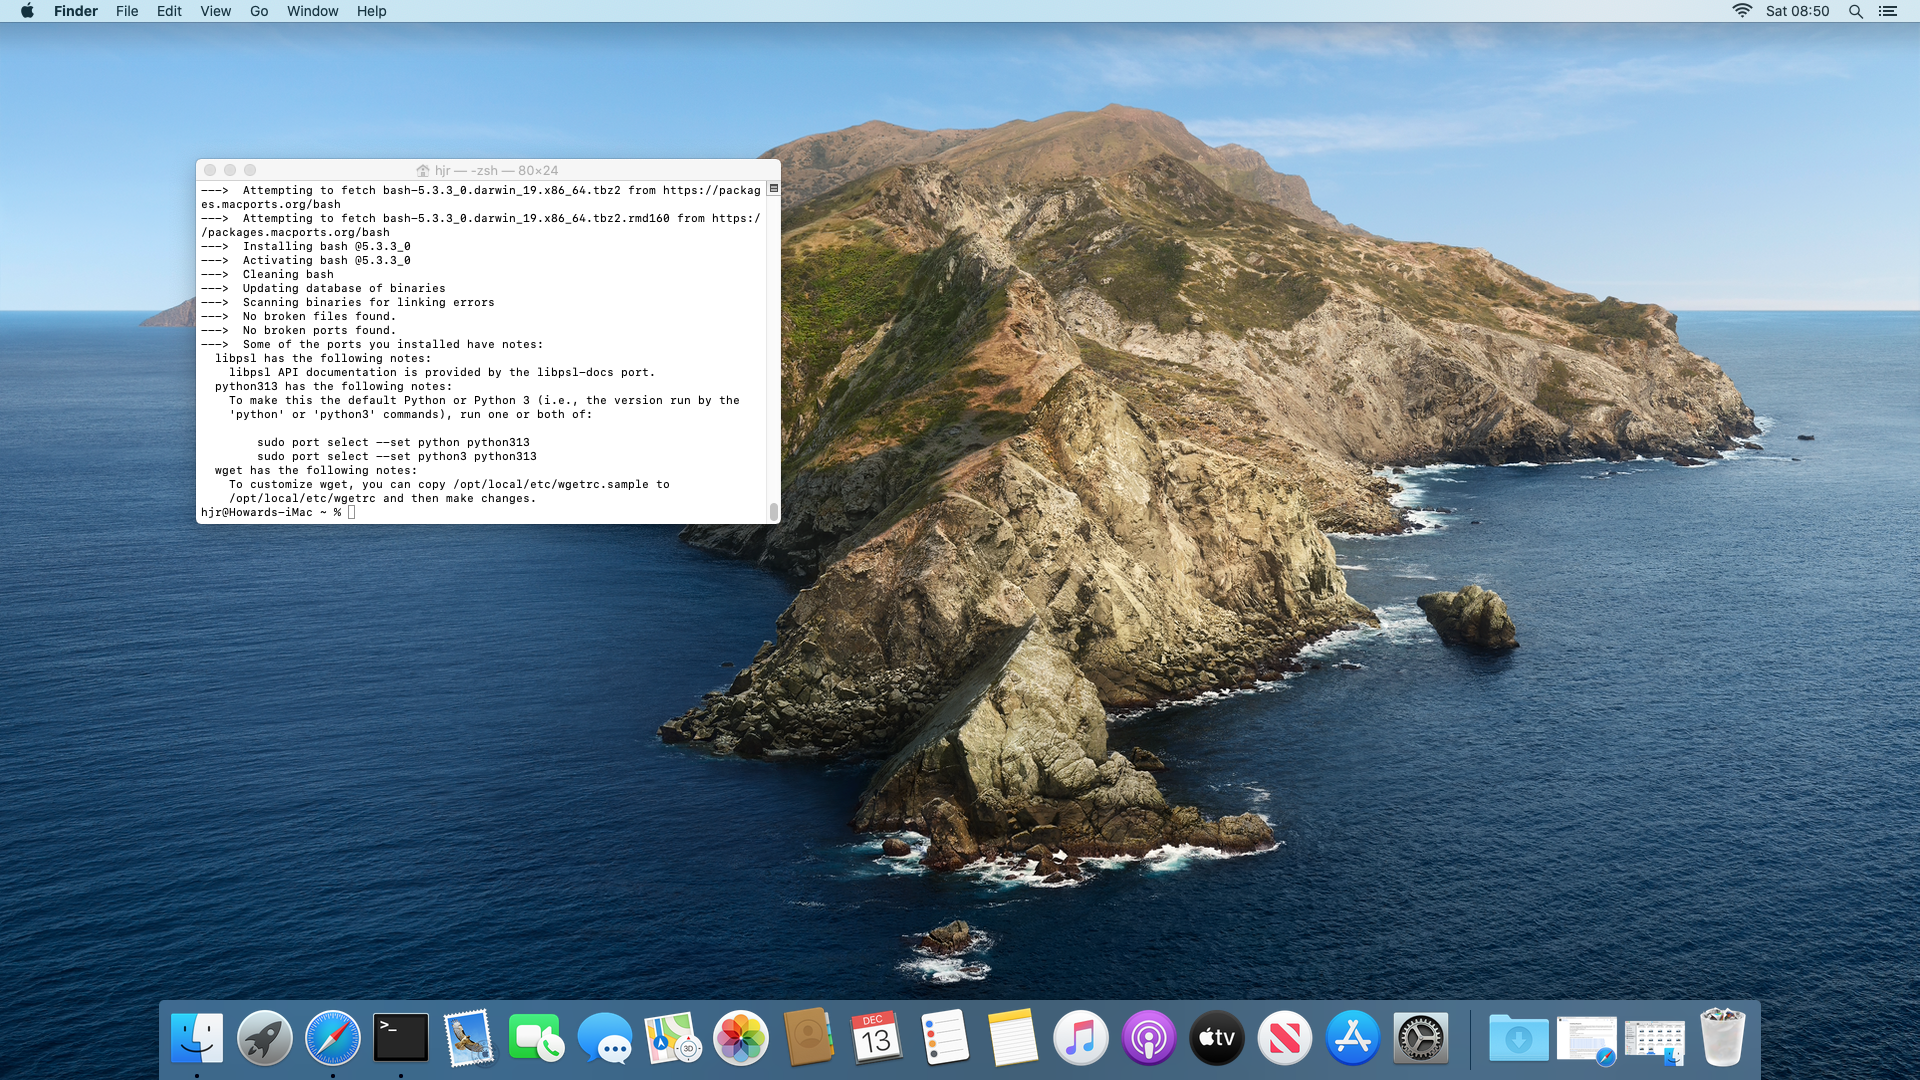
Once you see that, your system is ready to install Semplice. Be sure to close your terminal again at this point and open a new one: if you don't, you'll be trying to launch the Semplice installer in a terminal that only knows about the existence of the ancient, built-in version of Bash, which won't work. Only a freshly-opened terminal will notice that you've just installed a Version 5+ copy of Bash and make use of it.
4.0 Installing Semplice
Now you're ready to install Semplice, you first need to obtain the installation script itself. That's easily done in a terminal, with the command:
wget software.bbritten.com/seminst
To launch the downloaded script, you then just type the command:
bash seminst
That should immediately trigger the following display:
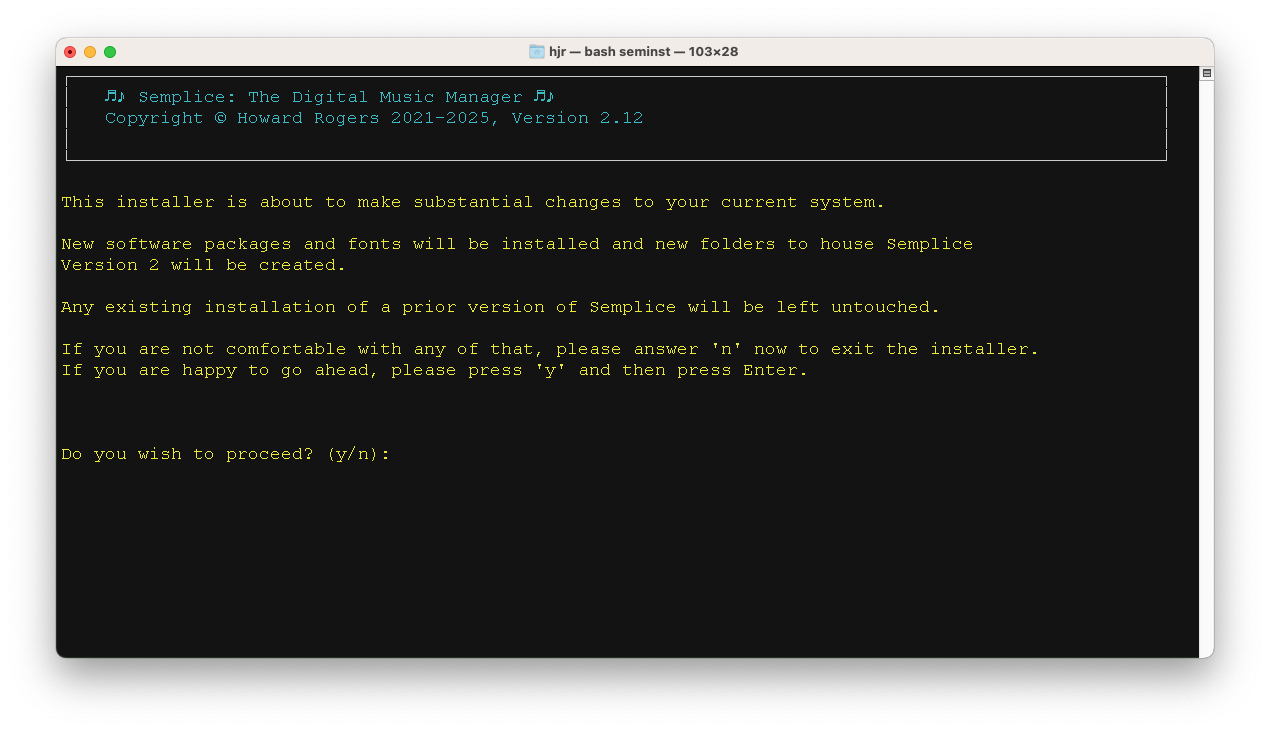
This text just warns you that an assortment of software is about to be installed on your system and some configuration changes will be made. You can back out at this point, by tapping 'n', and nothing at all will have changed on your PC… but if you tap 'y', the installer will proceed. You'll first be asked to supply the sudo password, so that the installer script can obtain the root privileges it needs to do its work. Once you supply that, you'll see this bit of text:
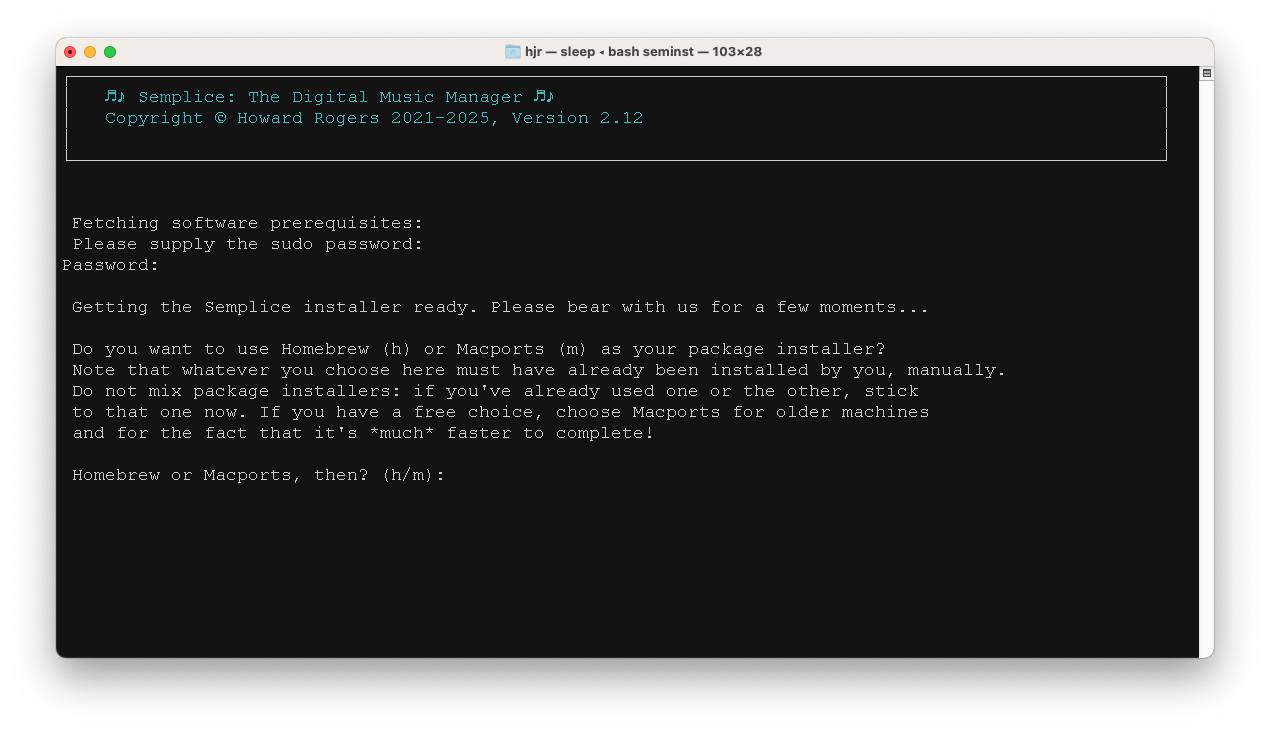
This is quite a crucial prompt to get right. Semplice can use either Homebrew or MacPorts to install the software it depends on …but it's vital that it shouldn't use the package manager that's inappropriate for your system. If you've installed Homebrew, Semplice mustn't try to use MacPorts and, of course, the opposite also applies. Your job is therefore to tap 'h' or 'm' to tell the installer which package manager to use during the installation process. Make sure you pick the right one, or mayhem will ensue!
As soon as you've selected the correct package manager, the screen will change to this sort of thing:
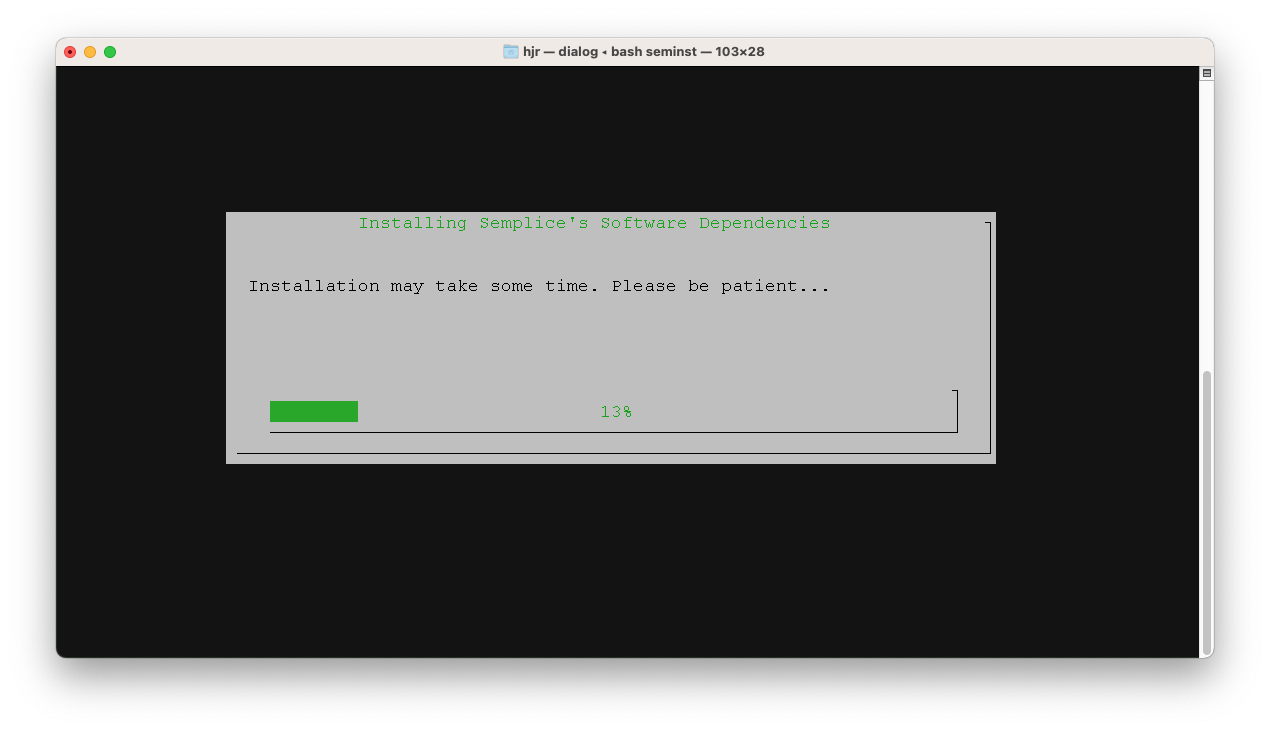
This part of proceedings can take quite a while (potentially a very long time if you're using the Homebrew package manager): be patient and let it do its thing! Eventually, the screen will change to this:
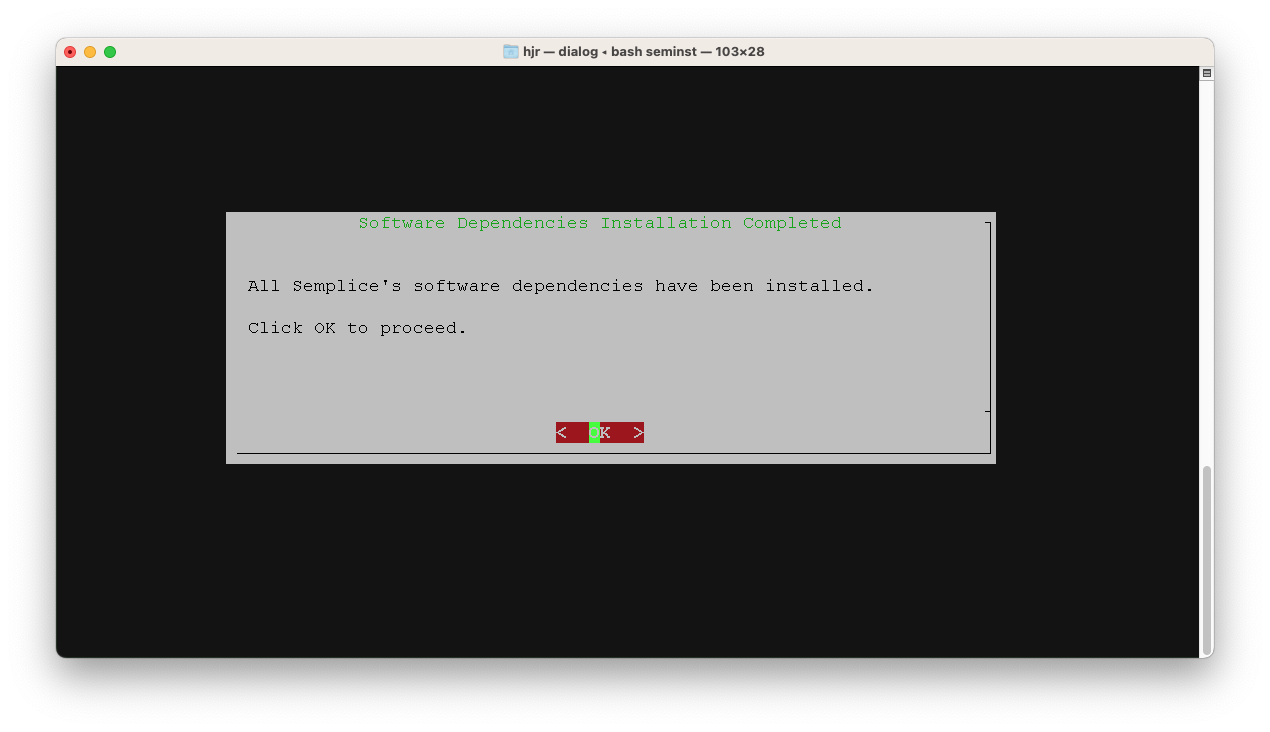
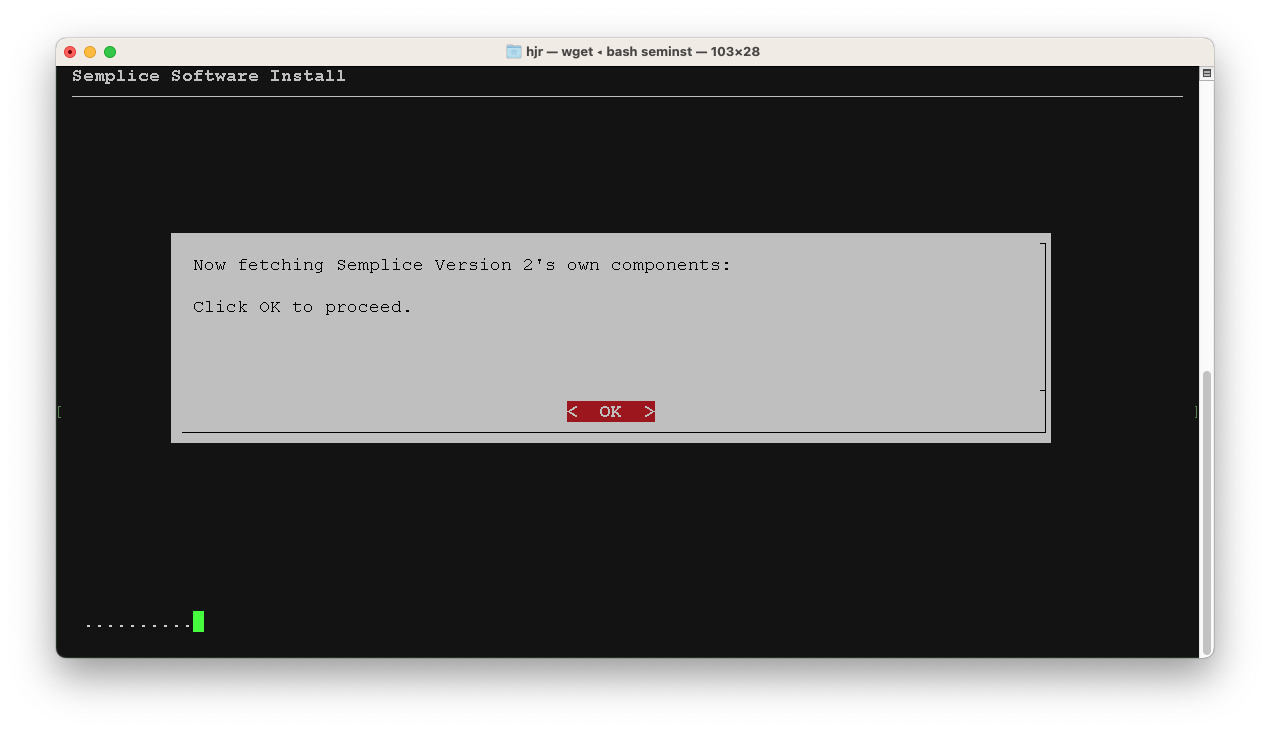
With the software prerequisites dealt with, the installer will now download Semplice itself: just click OK (or press [Enter]) to move on to that next step:
Be warned that, depending on how long the earlier phases of the installation process have taken, your sudo privileges may have expired. You might therefore see this sort of thing:
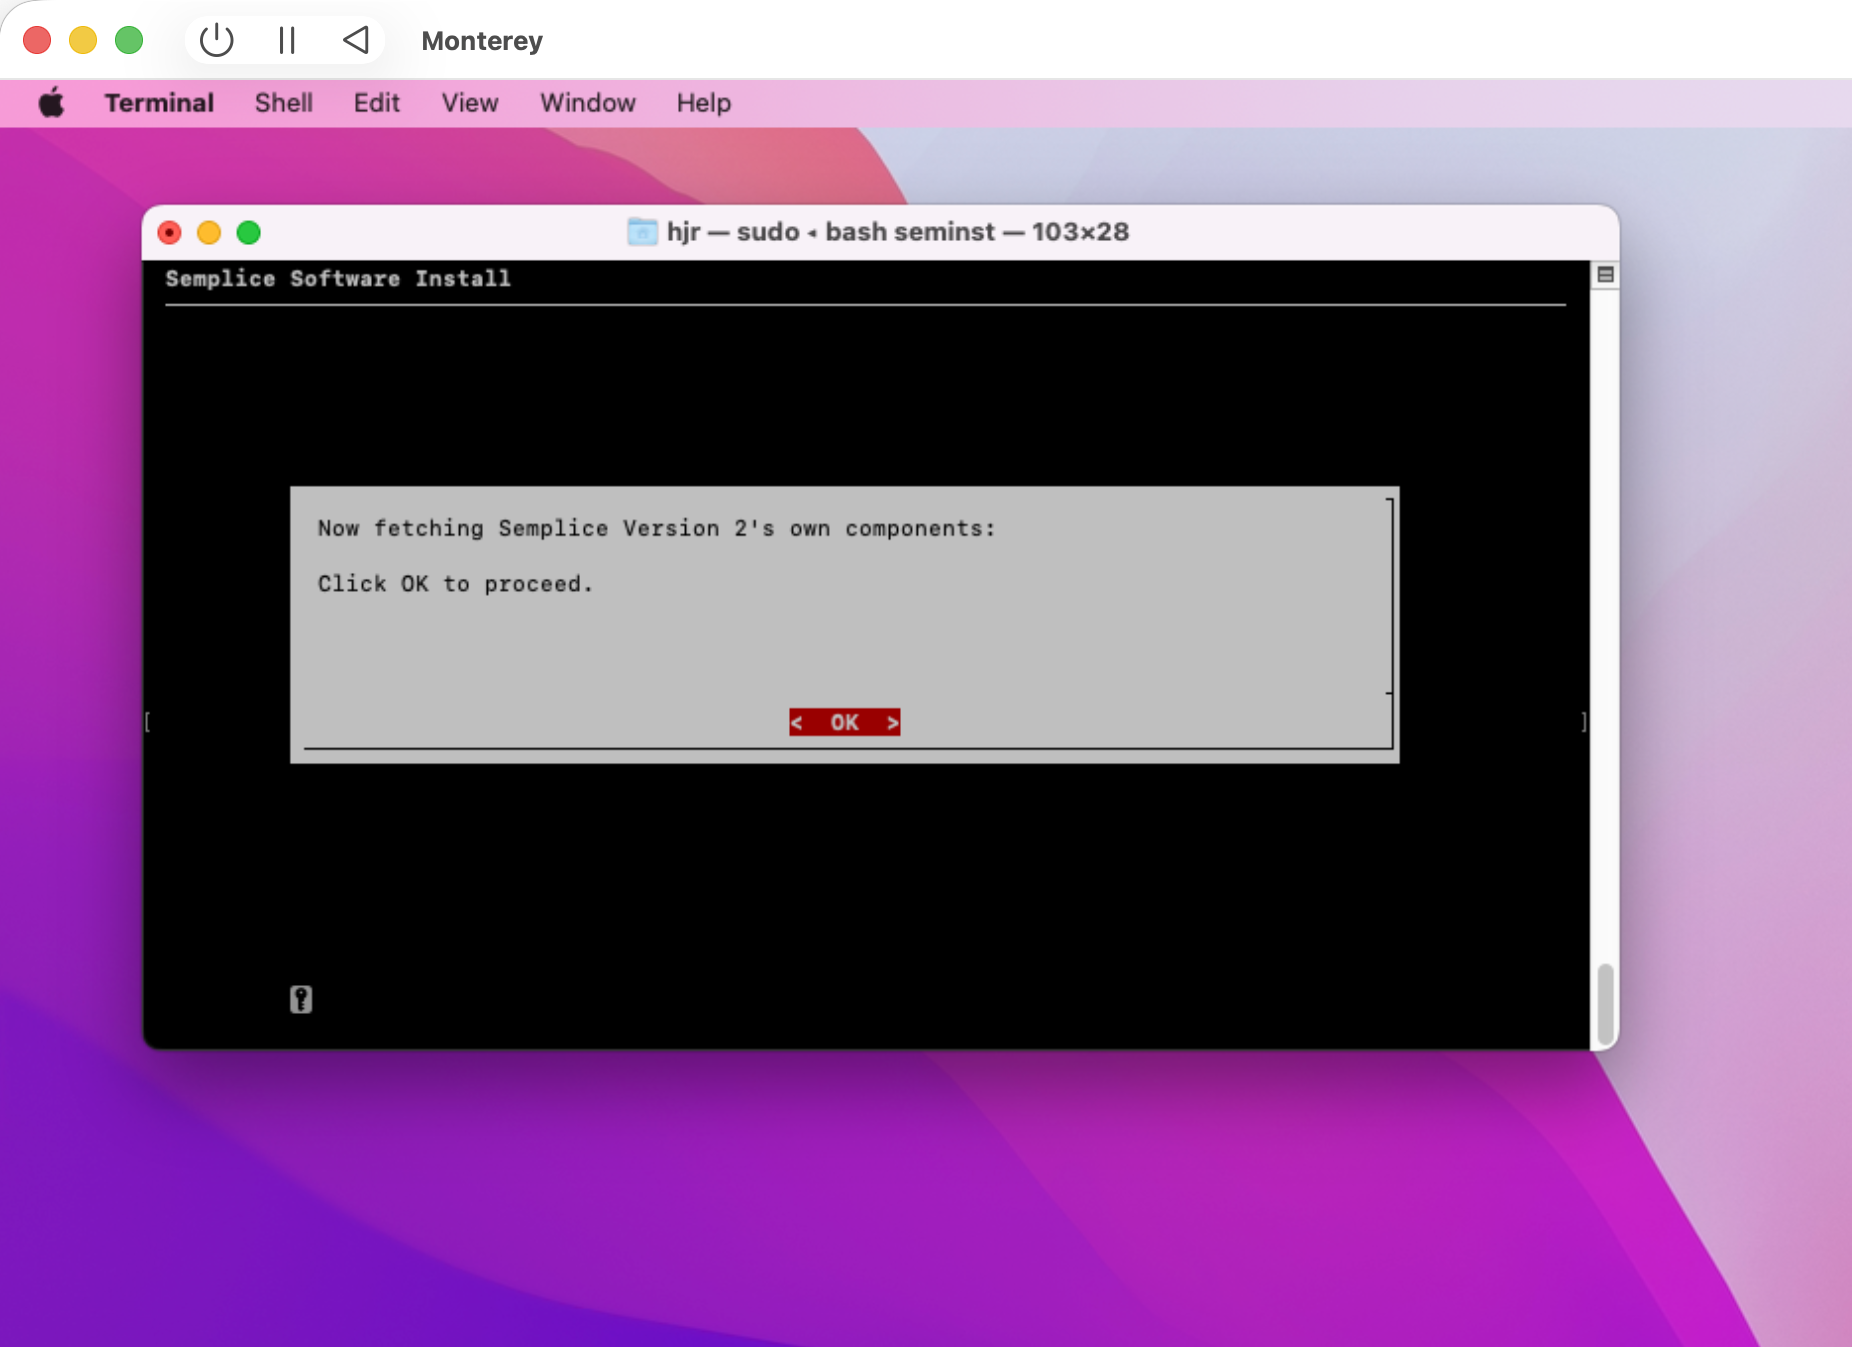
That little key icon is the clue: it's a prompt for you to supply your sudo password afresh, though I'm afraid it's not terribly obvious! Keep an eye out for it, anyway. Once the dowanload of Semplice's own components begins, it will speed by pretty quickly: Semplice's bits and pieces are measured in kilobytes, not gigabytes! When they've all been downloaded, you'll be prompted once more to begin a verification process, where the installer computes a hash sum for the things it has downloaded and compares those hash values to ones this website thinks ought to be true:
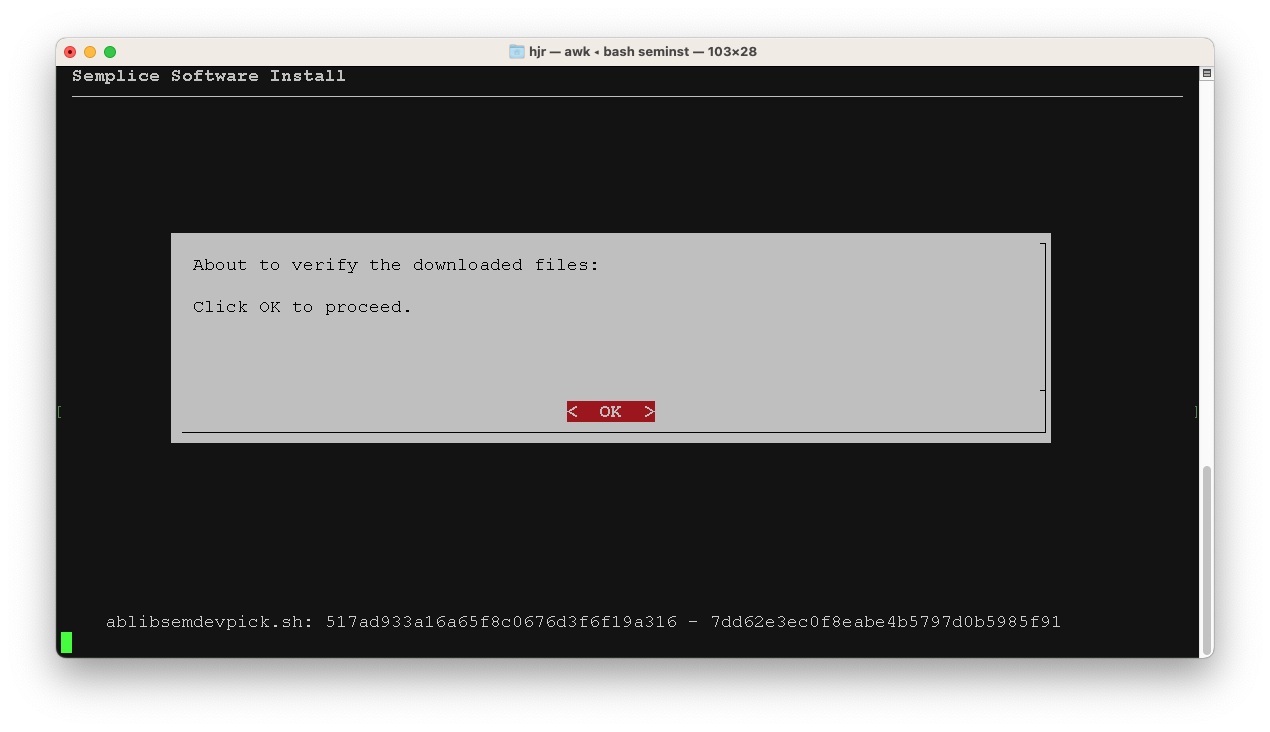
If any mismatches are detected, the installer will try to download the various components again, hopefully with a better result. One way or another, however, you'll end up seeing this:
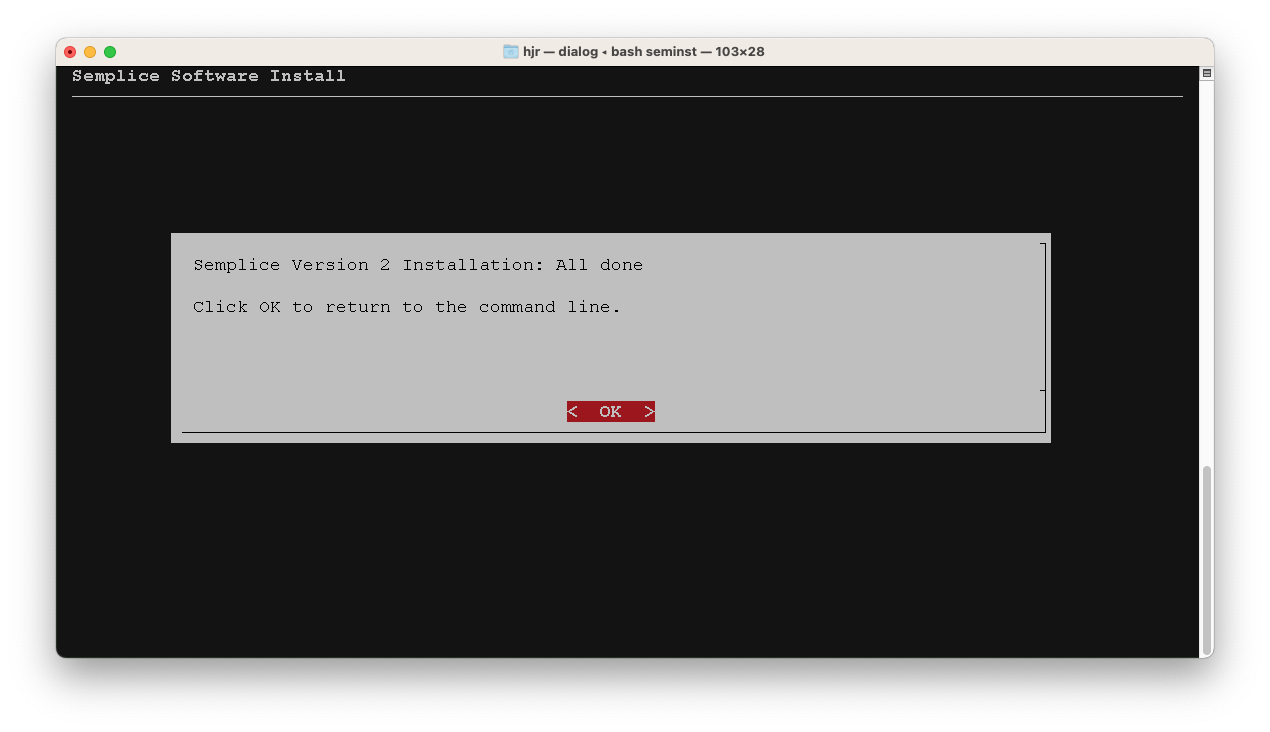
And that's it! Semplice is now successfully installed and can be immediately launched by typing the command semplice into a terminal:

Of course, that screenshot happens to look decent and usable because I've previously altered the default Terminal's default profile to be 'Homebrew', which is dark and green. If I'd been using the default Terminal in its default mode, the results might not have been quite so desirable, however:
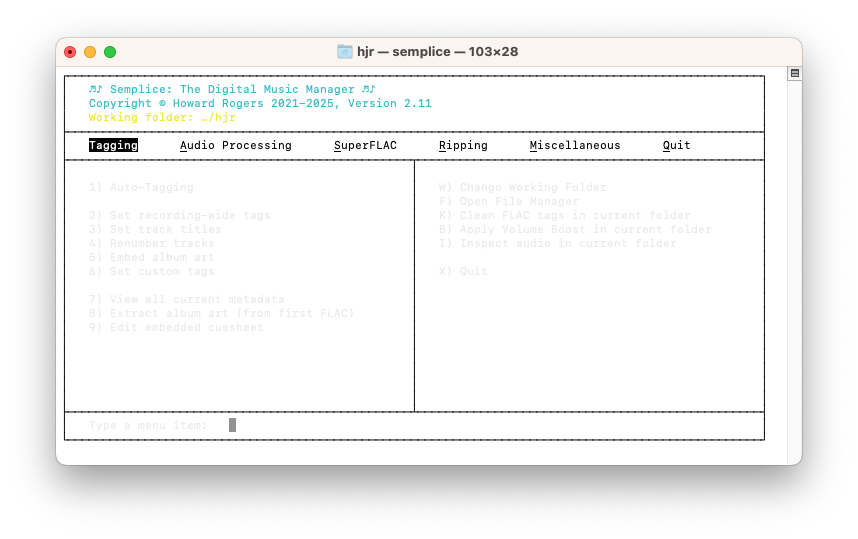
That's barely legible, of course: but that's a function of your Terminal profile, really. I'll show you later how you can resolve this in a way that doesn't require you to change your Terminal profile if you don't want to. We'll sort this out shortly, but for now the point is that Semplice is installed and works!
5.0 WezTerm to the Rescue!
Appearing in all the wrong colours is easily fixed by altering Terminal's colour scheme (click Terminal → Preferences → Profiles and pick one such as 'Homebrew' or 'Pro'). However, my preferred environment in which to run Semplice is WezTerm, an alternative terminal emulator. In fact, as it turns out, if you ever want to edit an embedded cuesheet with Semplice on macOS, WezTerm has to be installed: there is currently a hard dependency on WezTerm to display the text editor, since macOS's version of xterm won't respect font size or font directives when launched and therefore you would end up with a ghastly, tiny text display that is functionally a disaster area. WezTerm is thus a hard dependency of Semplice on macOS.
If you are using MacPorts, therefore, I recommend you run the following command:
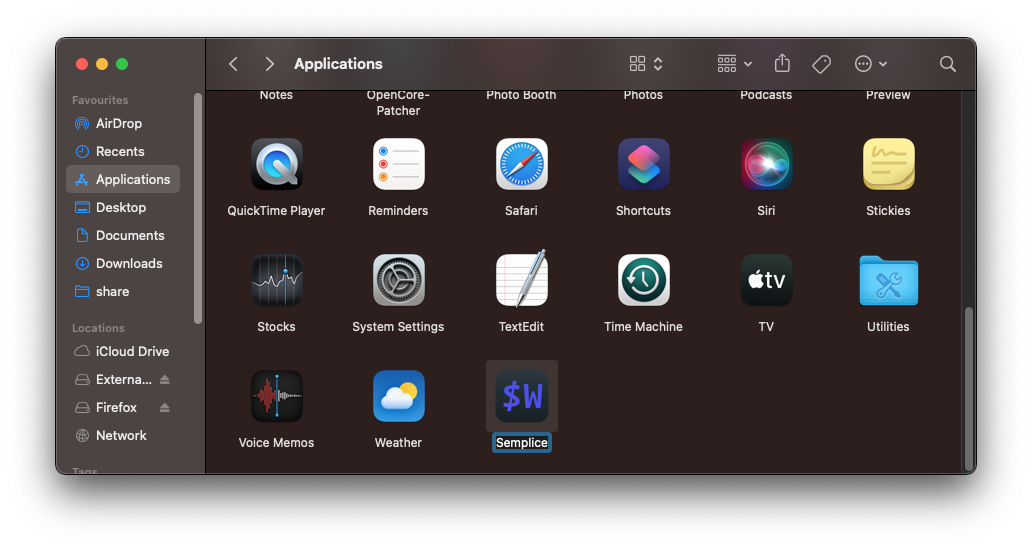
sudo port install wezterm
…which will install the WezTerm terminal emulator, which does know how to render sixel graphics. It should appear in the Launchpad display as a black square with a blue “$W” in it. There's no need to do this now if you're using Homebrew, because I included the command to install that way back in Section 2 anyway.
WezTerm will tend to want to open by default using a small window with small fonts: I suggest you would want to change that up a bit. The way you do that is to issue these commands:
cd
nano .wezterm.lua
Paste into the new file the following:
local wezterm = require 'wezterm'
local config = wezterm.config_builder()
config.initial_cols = 103
config.initial_rows = 28

config.colors = {
    -- The default text color (green is dark green, lime is bright green)
    foreground = 'lime',
    -- The default background color
    background = 'black',
}

config.font = wezterm.font("Courier New", {weight="Regular", stretch="Normal", style="Normal"})
config.font_size = 16

wezterm.on('format-window-title', function(window, pane, tabs, panes, config)
    return "Semplice : The FLAC Manager"
end)

return config
Save the modified file. Hopefully, most of this is self-explanatory: it tells WezTerm to open at an initial 103 columns by 28 rows; to use the built-in Courier font (more on this below) at 16pt size, and to auto-launch Semplice when it itself launches. With these parameters configured, launch WezTerm by clicking its icon in the Launchpad:
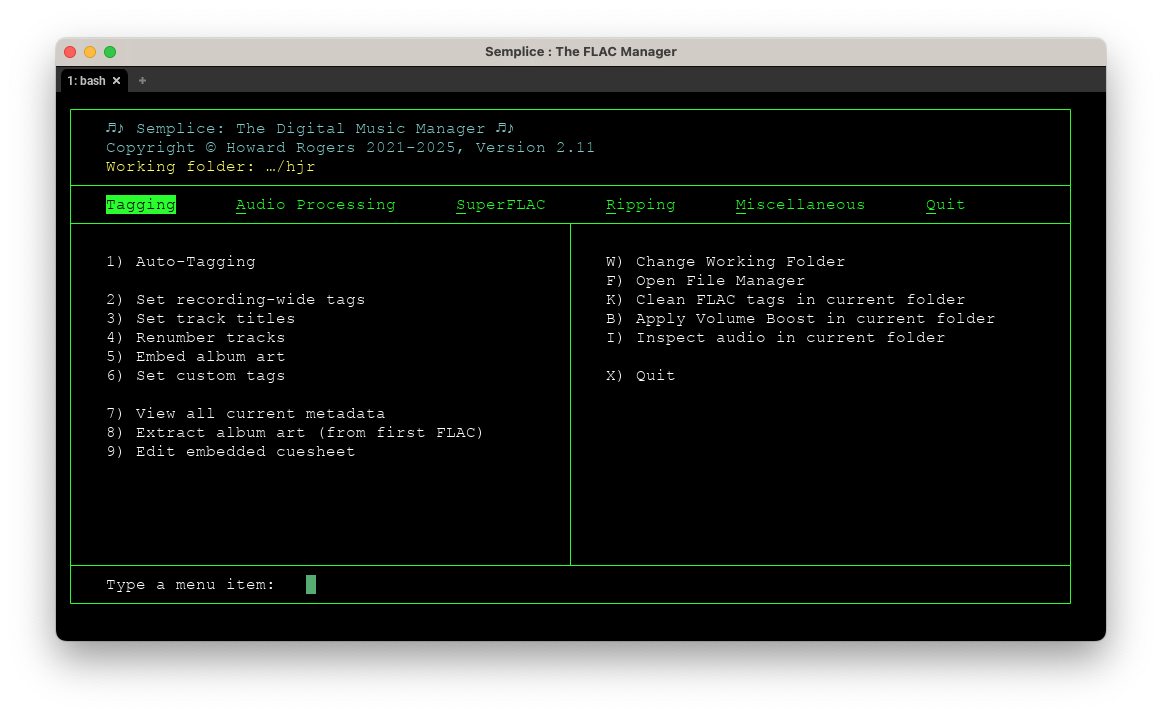
That's a rather pleasing display, I think.
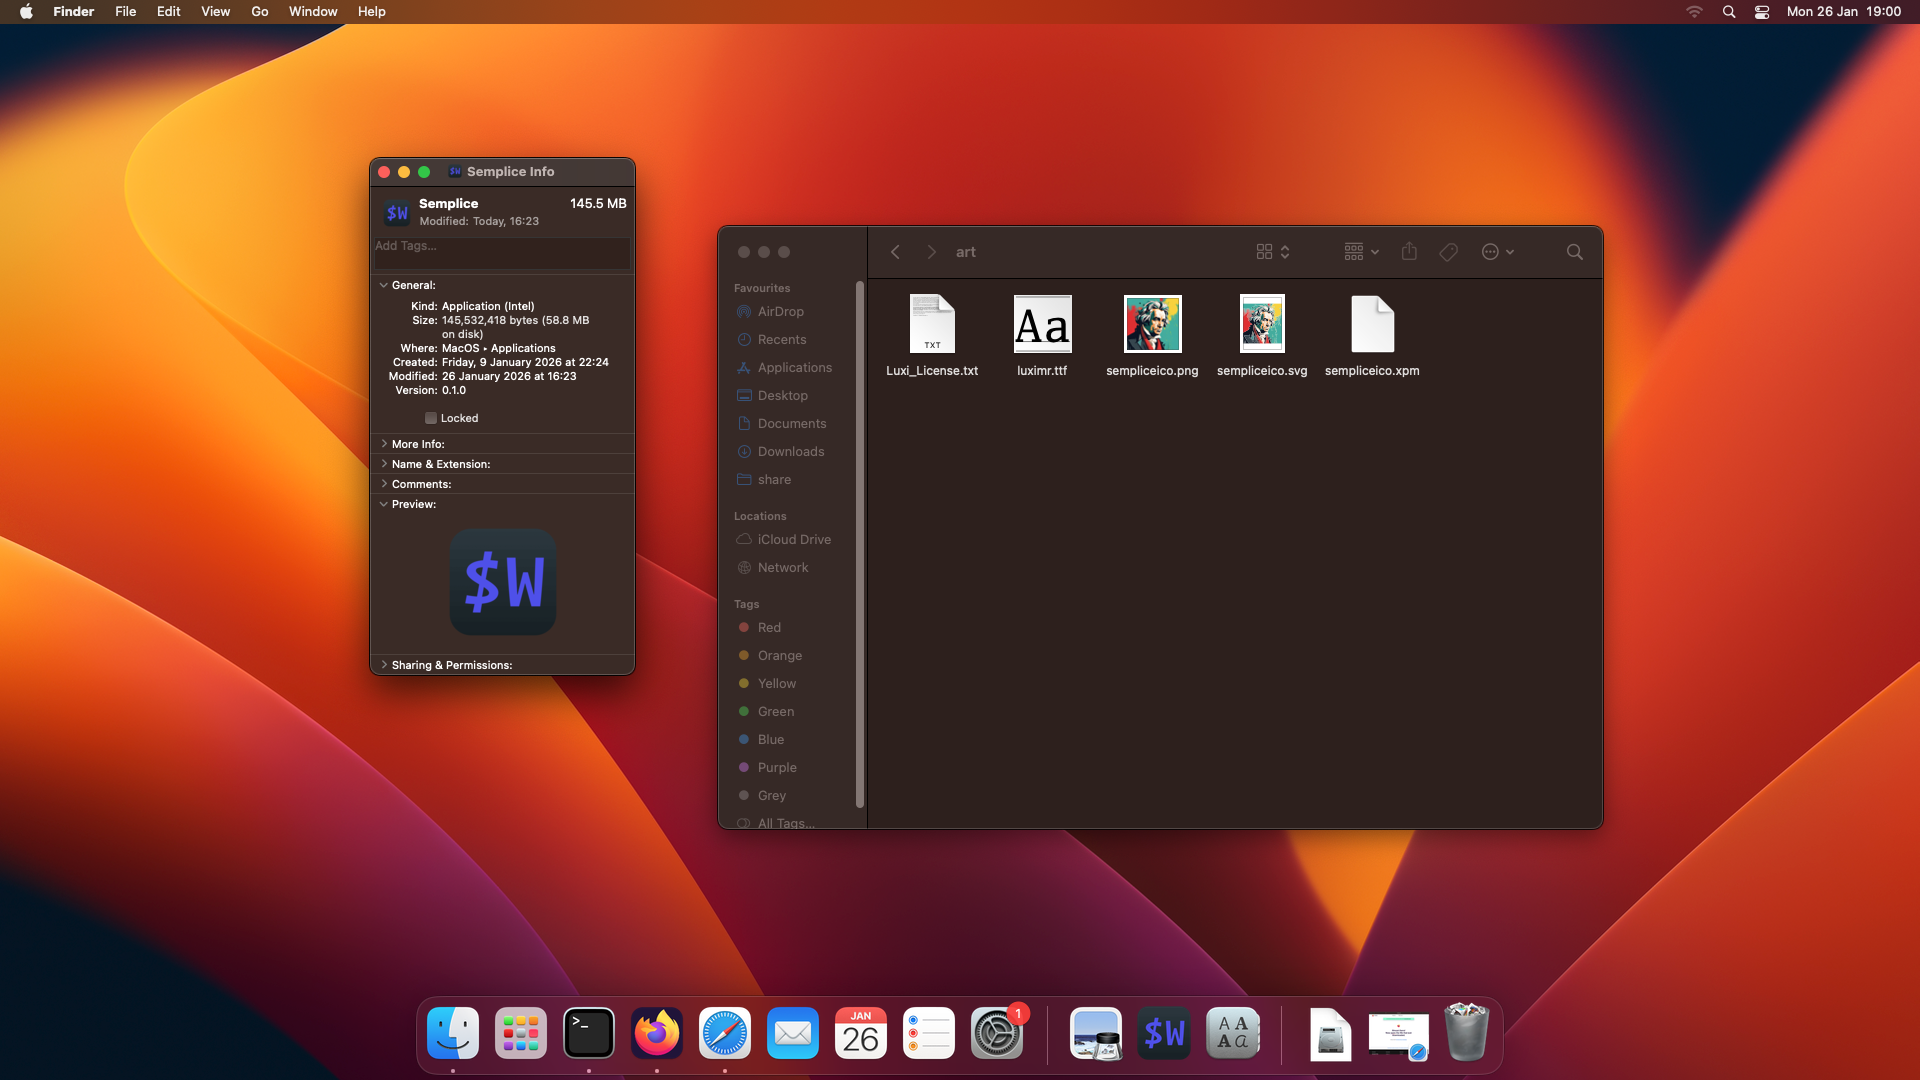
Be aware that Semplice supplies a font it thinks you might want to use instead of the 'Courier New' one I've mentioned in the above configuration file: Luxi Mono. It can be found in the /Users/hjr/.local/share/semplice2/art folder (the “hjr” bit is my username: substitute in your own, obviously!), as a file called luximr.ttf. Double-click that to launch the Apple Font Book utility which lets you install it:
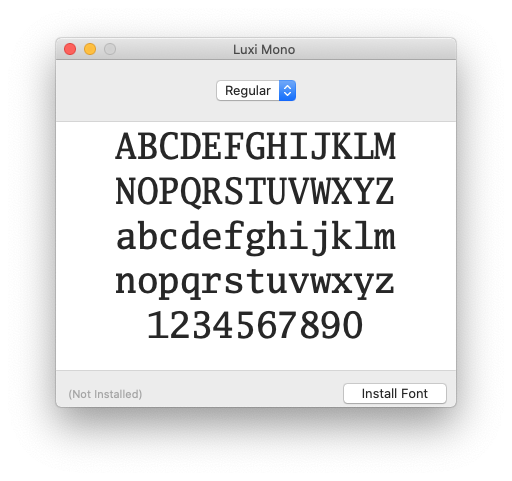
Once the font has been installed, re-edit the .wezterm.lua file and replace the name “Courier New” with “Luxi Mono”, leaving all other text unchanged, and save the file. You should see the existing terminal update itself to display the new font:

The new font is slightly serif (the characters have little hooks at their tips and so on) and not quite as spidery as Courier New… but the choice of font is, ultimately, up to you.
6.0 Final Graphical Tweaks
The last thing you might want to consider is creating a proper program launcher for Semplice that looks like it belongs to Semplice and not Wezterm! Here, for example, is my dock:

You'll note that the second icon in from the left is, indeed, something that looks like it might want to launch Semplice. How do you achieve that?
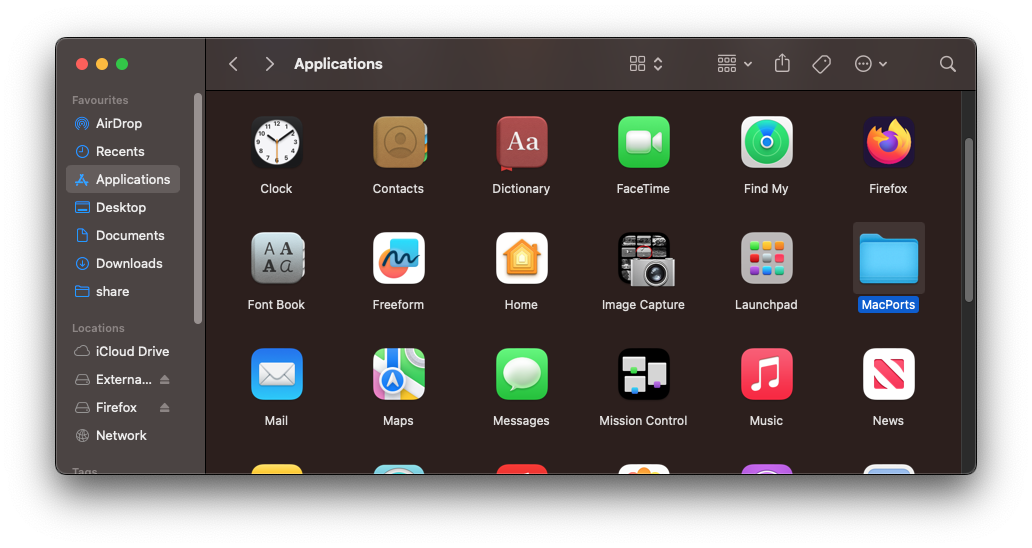
Well, first open Finder and visit the Application section: there you'll find a MacPorts folder (assuming you've used MacPorts to install everything, of course):
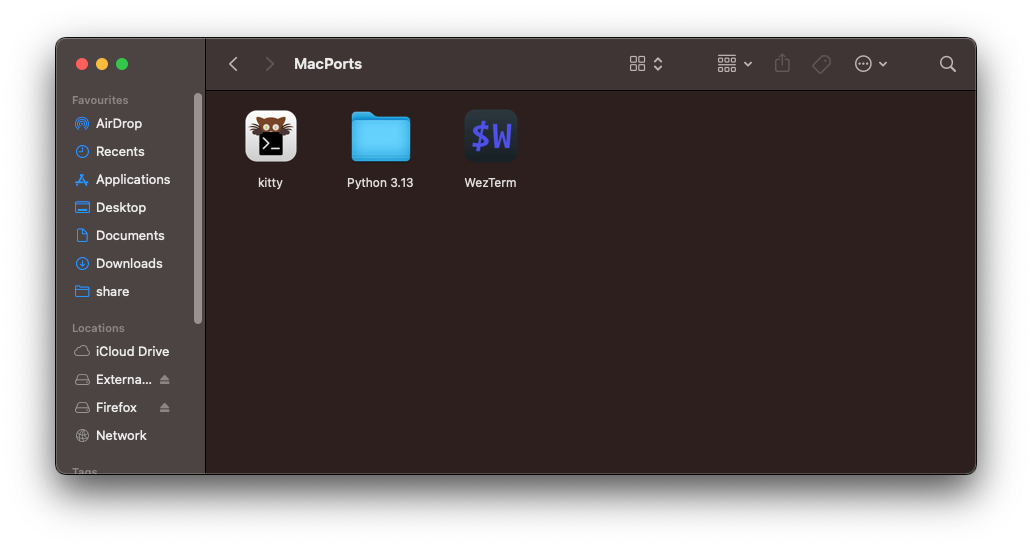
Inside that folder, you'll find the icon used to launch WezTerm:
Right-click that icon and select 'Copy' from the context menu; then click back to the Applications section and right-click and select 'Paste': you'll now have a WezTerm icon in the 'root' of the Applications folder:
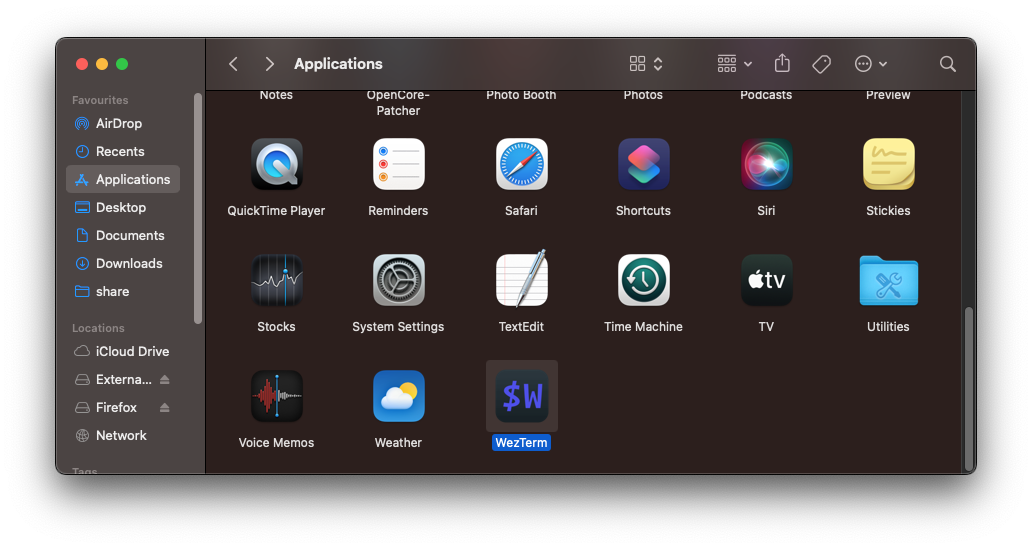
Right-click this new icon and select 'Rename' from the context menu and then change the text label for the icon to 'Semplice':
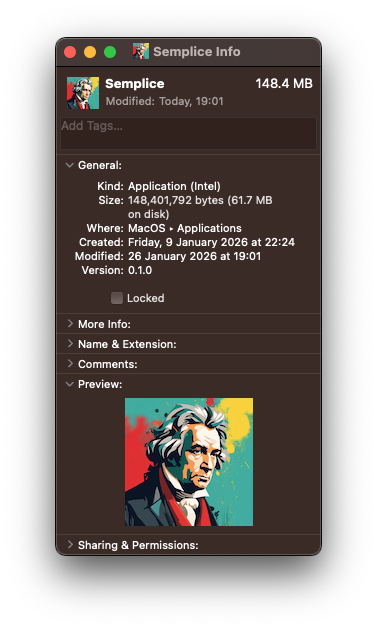
Now comes the slightly tricky bit to describe! Right-click the new 'Semplice' icon and select 'Get Info' from the context menu. That will open up an information panel about the executable associated with the icon. Keep that open whilst, back in Finder, you select 'Go → Go to Folder…' from the top menu: for the path to go to, type /Users/hjr/.local/share/semplice2/art (replacing 'hjr' with your own username, of course):
Your job now is to click-and-drag the sempliceico.png from the art folder in Finder on top of the tiny '$W' icon in the top left-hand corner of the Semplice Info panel. Drop the png on top of the existing icon and you should see both the little and big icon at the bottom of the Info panel change:
Now you can close the Info panel down. In the Finder window, you can now double-click the new Semplice icon to launch WezTerm. That will put the running application-with-Semplice-icon into your dock: right-click it to say 'Keep in Dock' and then drag it to where you want to see it in future. Bingo: you now have a proper-looking application launcher that will allow you to run Semplice easily within a terminal emulator. You'll still have to type the command semplice to launch the program, but at least it looks graphically plausible!
A couple of additional notes of caution and advice. First: earlier versions of macOS (think: Catalina, especially) do not allow you to drag .png files onto the Info panel as I've described here. On those versions, you first have to convert the .png supplied by Semplice to a .icns format and then drop that version of the artwork onto the Info panel's little icon placeholder. I use this free on-line converter to do that. Point the site to the .local/share/giocoso3/art/sempliceico.png file, click convert, then download the converted file. Drag that to the Info panel and you can delete the download afterwards.
Second: if you used Homebrew to install Giocoso, you won't find WezTerm inside a MacPorts folder: it will be directly in the Applications section of Finder. The same technique applies, however: copy it, paste it, rename it, re-icon it.
7.0 Some Security Considerations
From about Monterey onwards, Apple really locked security down on macOS. By default, this breaks quite a lot of Semplice functionality! Some of the security issues get resolved by you attempting to do things in Semplice and pop-ups asking for permissions appear. Click to grant those permissions when requested and you're good to go.
Not all required permissions are gained so easily, however. My general advice is to grant both Terminal and WezTerm full disk access and the ability for both those programs to control your computer. On Sequoia, for example, this latter privilege is found in System Settings → Privacy & Security → Accessibility → Allow assistive applications to control the computer. SACD rips (for one) won't work without this step, though if you never intend to rip SACDs, I suppose you could live without granting that specific permission.
You also may need to allow sacd_extract (whether of Intel or Apple Silicon variety) to be a trusted application. By default it won't be:
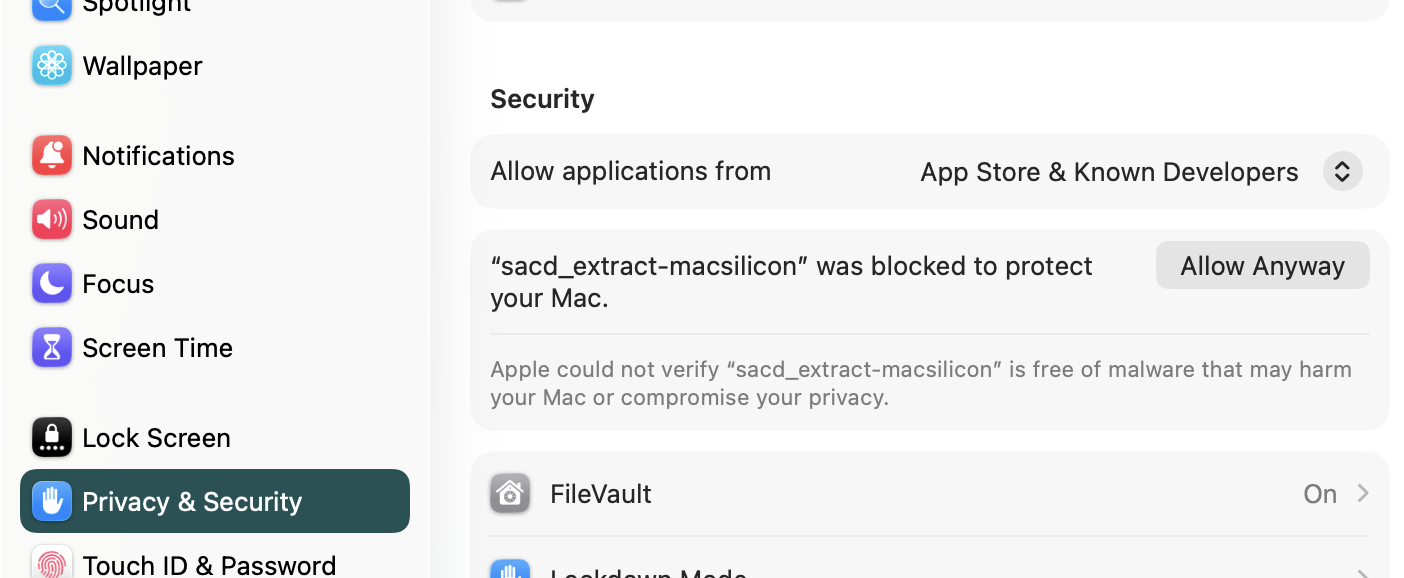
You'll only see this after your first, failed attempt to rip an SACD triggers the “This software can't be trusted” dialog. Once that has happened, however, go to System Settings → Privacy & Security and click to 'Allow Anyway' the sacd_extract- executable. Your second attempt to rip an SACD will still then generate this dialog:
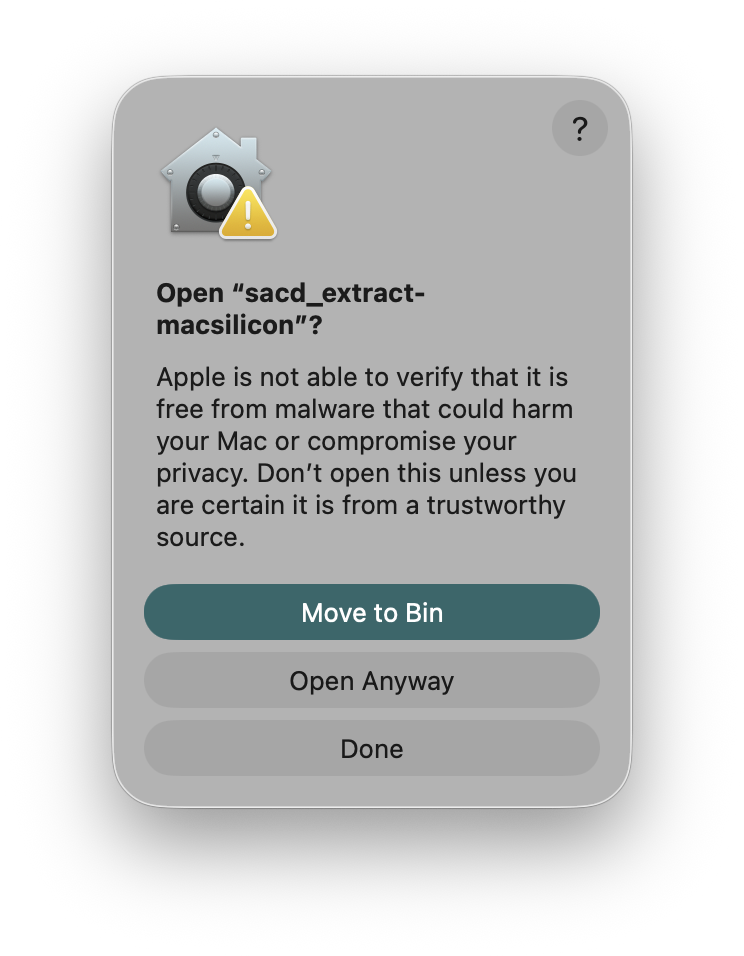
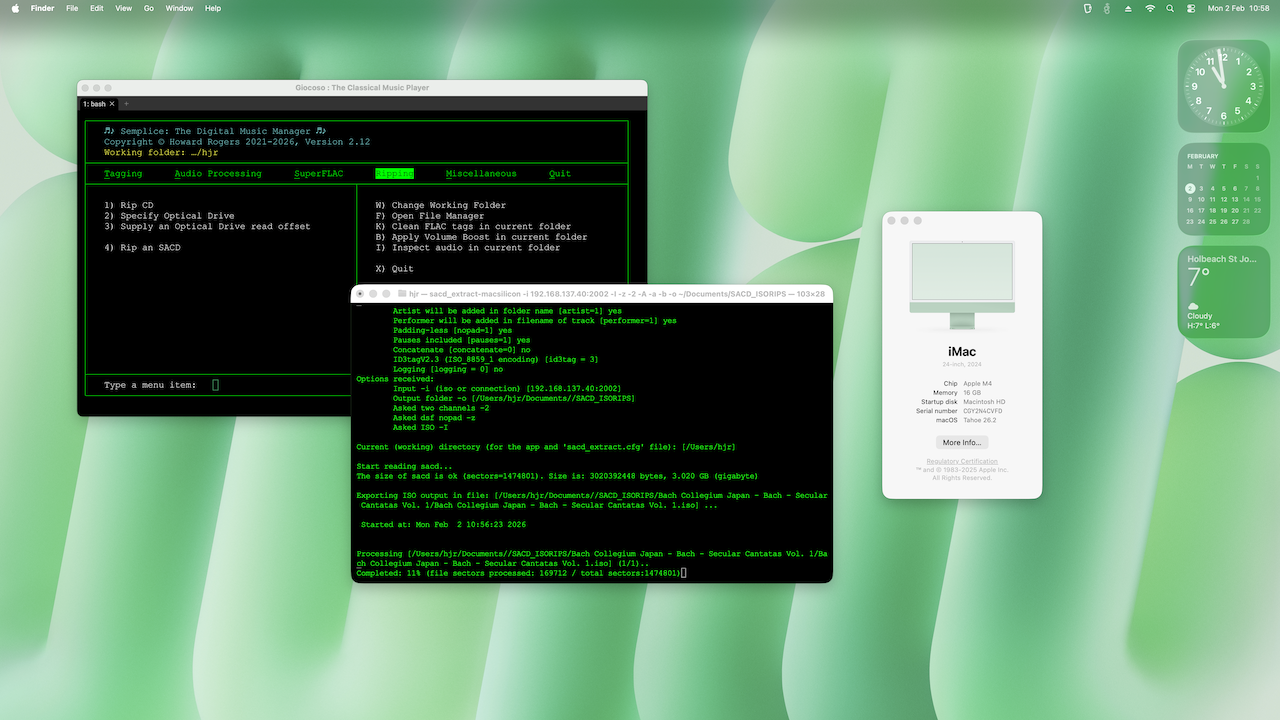
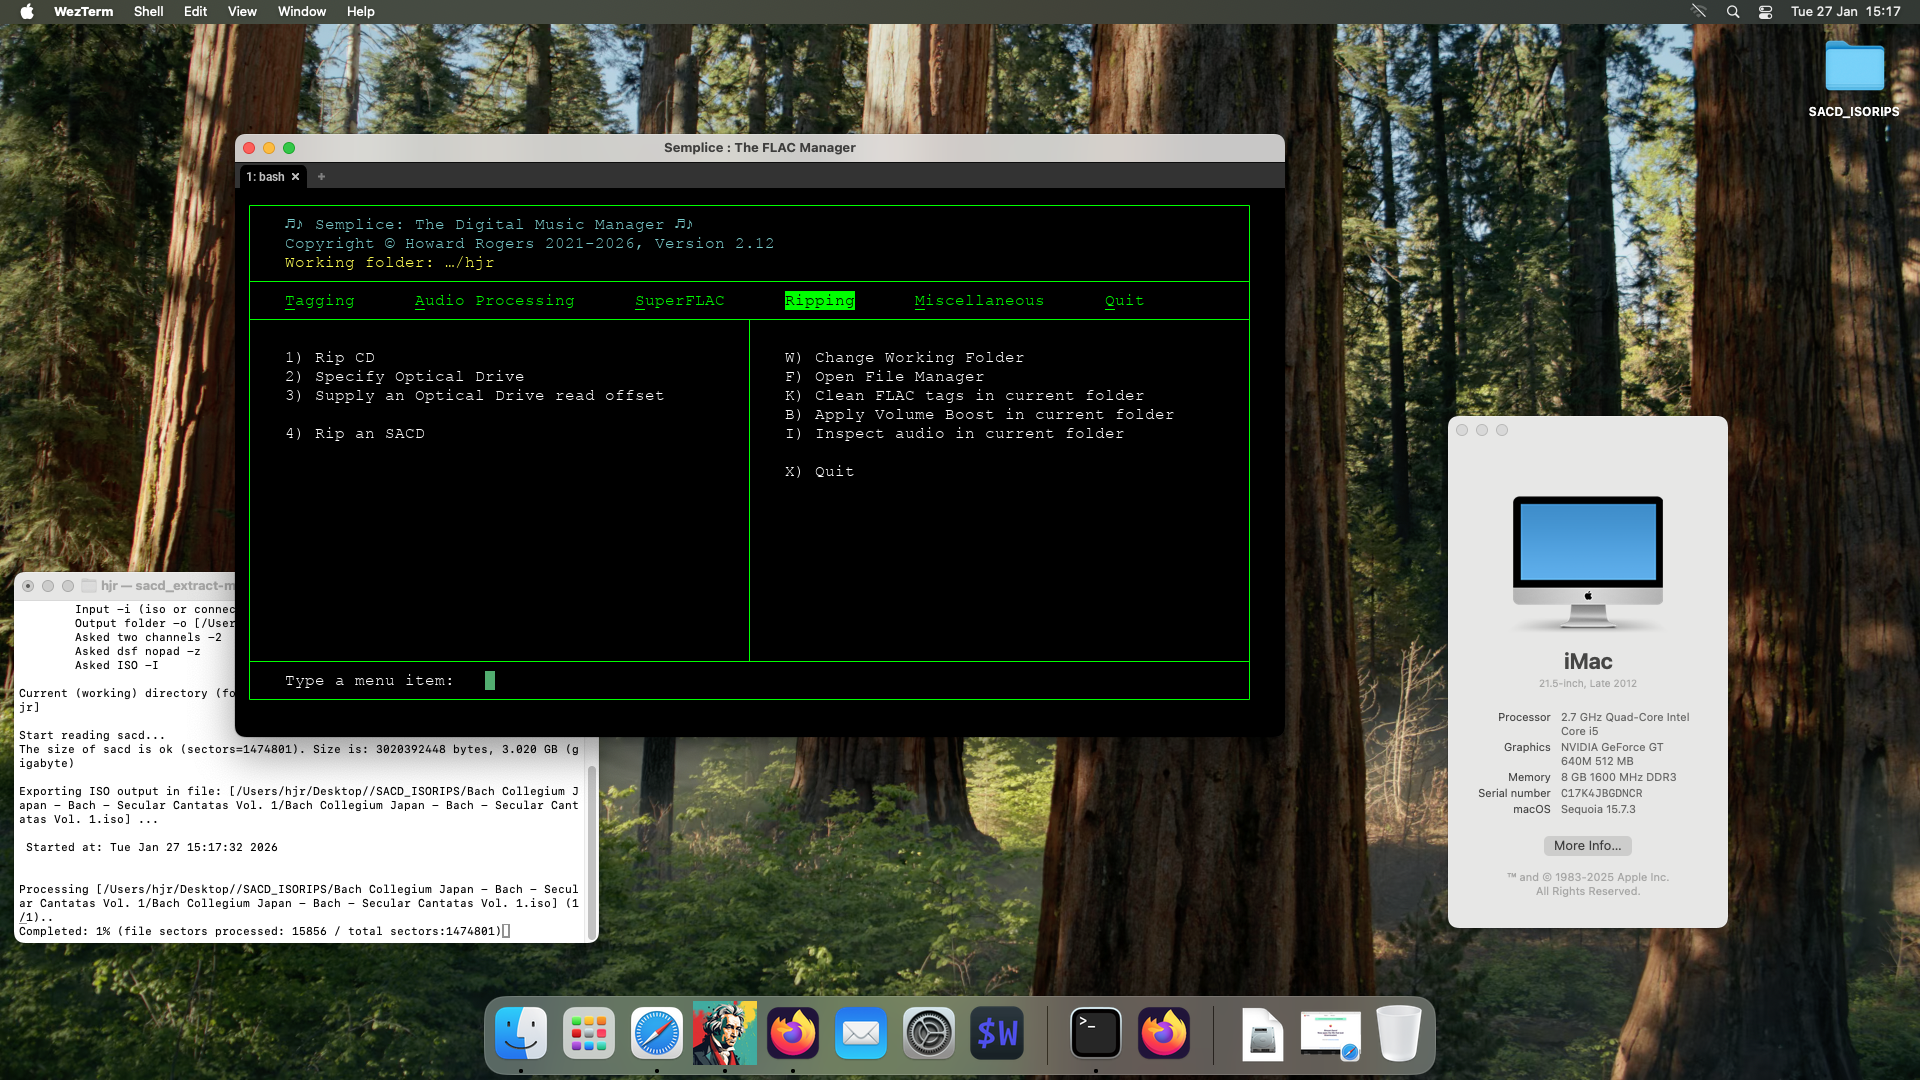
Click 'Open Anyway' there and you should at last be good to go. Again, the specifics of this complex web of security prohibitions depends on the version of macOS you're using. Just be assured that SACD ripping can work on something as modern as Tahoe, on Apple Silicon, as you can see here:
8.0 Conclusion
I've personally installed Semplice 2.12 on (a) Catalina; (b) Monterey; (c) Sonoma and (d) Sequoia. Unfortunately, that's where my Semplice-on-macOS adventures have to end, because my ancient pieces of Apple hardware can't run much beyond Sequoia… and they only do Sequoia because the OpenCore Legacy Patcher lets them do so at the rate of frozen molasses on an Antarctic winter morning! It is possible that I will win the National Lottery in 2026, in which case I shall be buying brand new Apple Silicon kit and will be able to report back more definitively as to what works and what doesn't on that CPU architecture: I wouldn't hold your breath, however!
In the meantime, I will sign off with a recommendation to use MacPorts if you run machines whose official support ended around the time of Ventura and Homebrew if you're running anything more modern and, as a final flourish, give you parting screenshots of my assorted real-world Semplice-on-Mac installations:
- Catalina, 2.7GHz, 8GB RAM (via MacPorts)
- Monterey, 3.1GHz, 16GB RAM (via MacPorts)
- Ventura, 2.7GHz, 8GB RAM (via Homebrew and Macports, using Legacy Core Patcher)
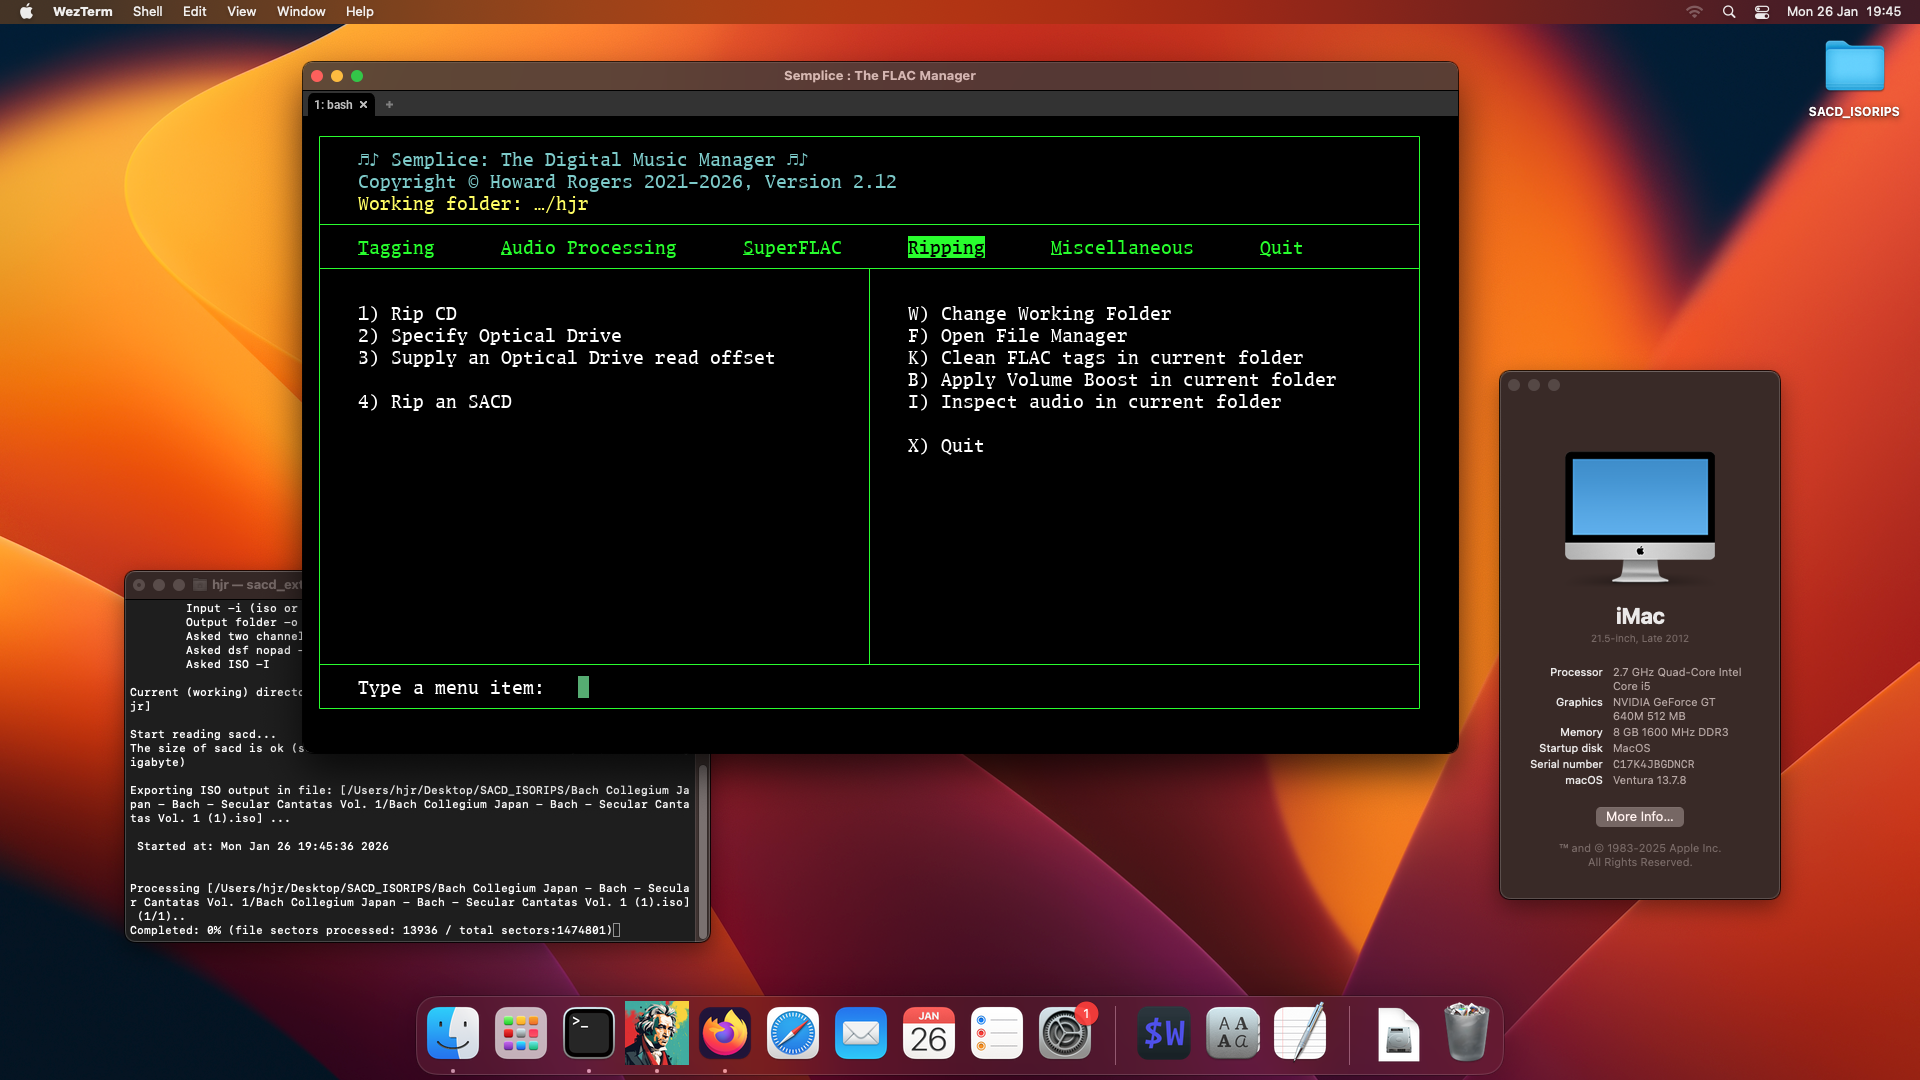
- Sonoma, 2.7GHz, 8GB RAM (via MacPorts, using Legacy Core Patcher)
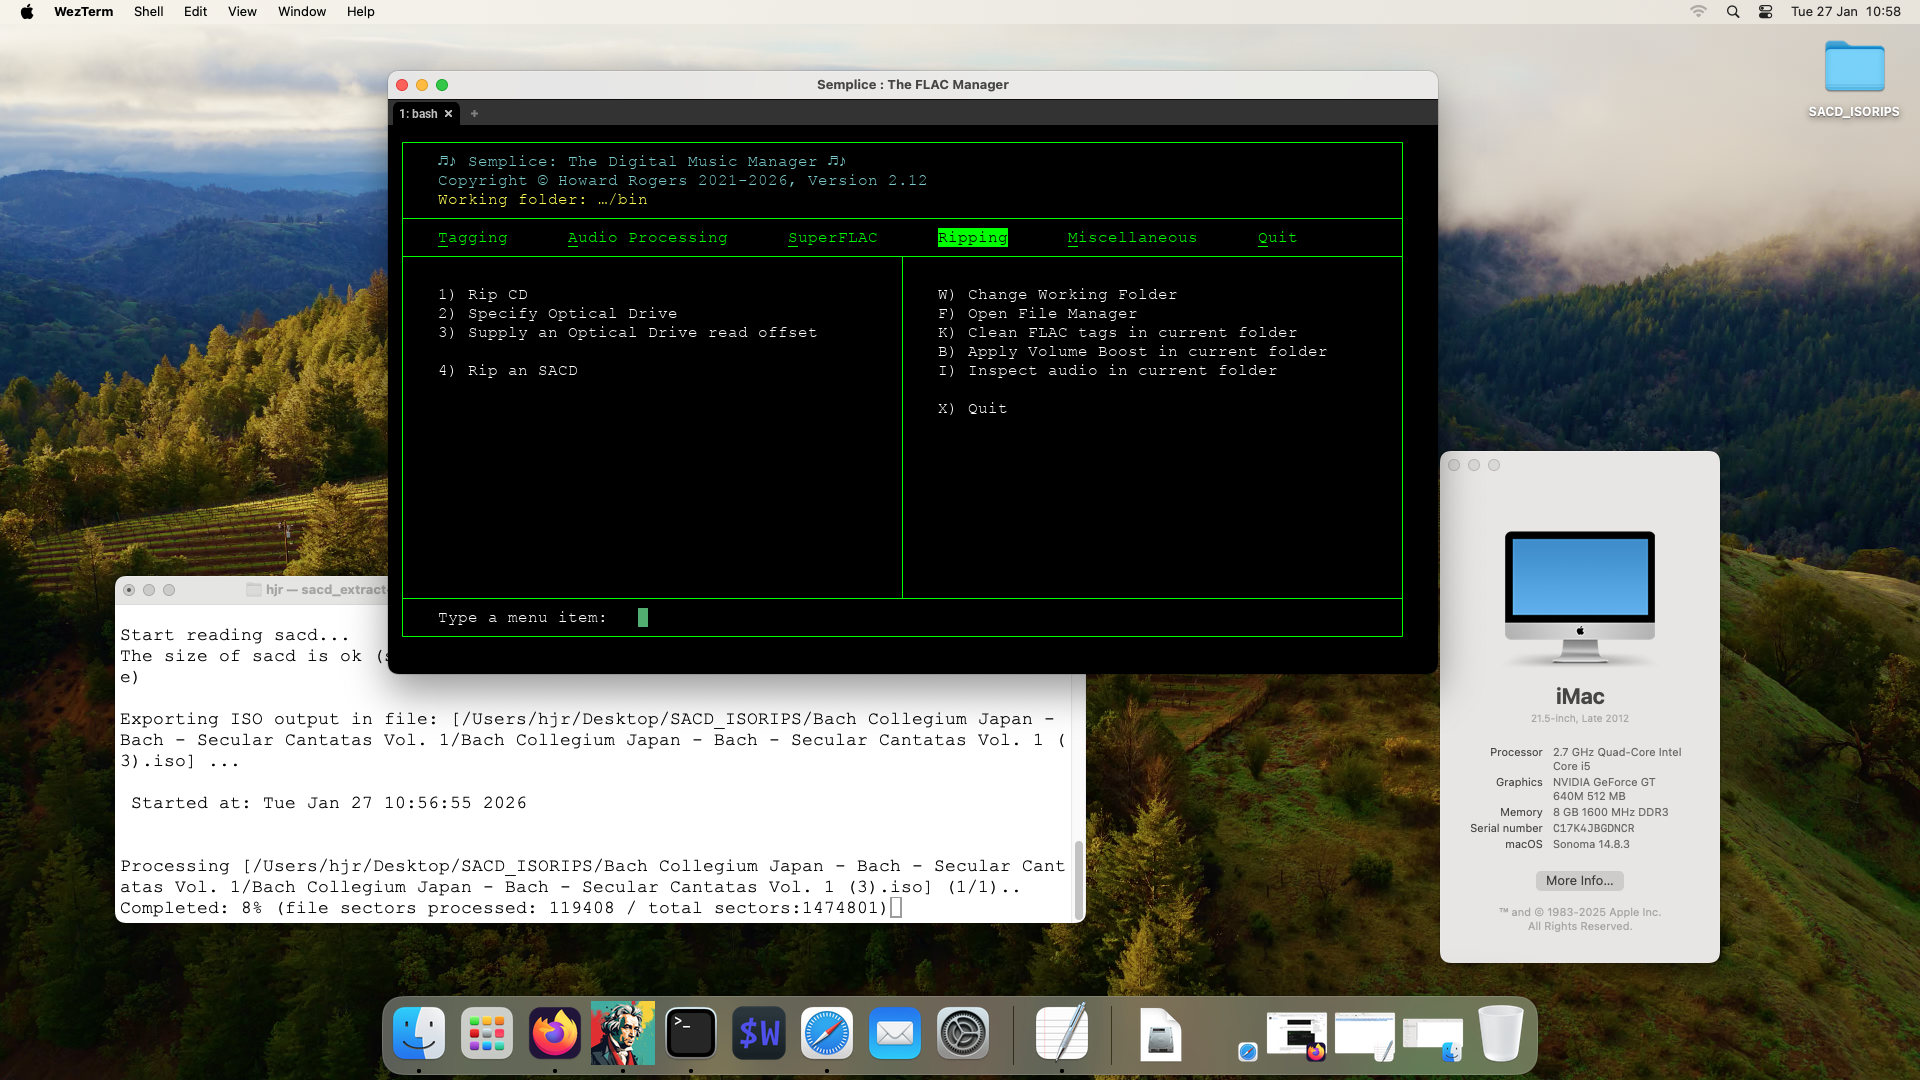
- Sequoia, 2.7GHz, 8GB RAM (via Homebrew, using Legacy Core Patcher)
| Back to Semplice Home Page |